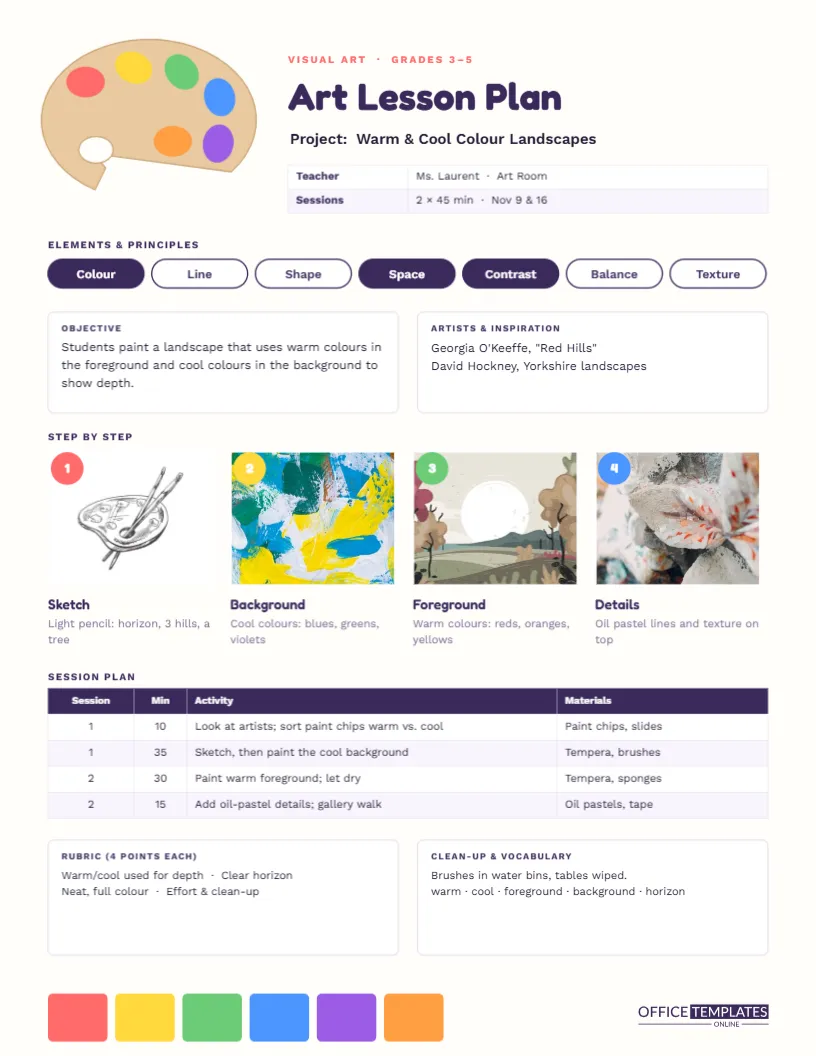
Art lessons are planned visually. Before teaching a project, art teachers usually make an example, photograph the stages, and decide which elements and principles of art the project will teach. A text-only plan misses most of that. This Art Lesson Plan Template puts pictures at its centre: four photo frames for the step-by-step exemplars, a paint palette in the header and a row of colour swatches along the bottom.
A Palette Beside the Title
The top-left corner holds a wooden paint palette, the classic kidney shape with a thumb hole, with six dabs of paint in coral, sunshine yellow, green, blue, purple and orange. Beside it, Art Lesson Plan is set in rounded Fredoka in deep plum, with the project name underneath: Warm & Cool Colour Landscapes. A small table records the teacher, room, and two 45-minute sessions on November 9 and 16.
Elements and Principles at a Glance
A row of seven pill-shaped chips lists the elements and principles of art: colour, line, shape, space, contrast, balance and texture. The ones this project focuses on are filled in plum (colour, space and contrast), while the others are outlined. Changing which chips are filled takes a click: select a chip and swap its fill and text colours.
Objective and Inspiration
Two boxes follow. The objective explains that students will paint a landscape using warm colours in the foreground and cool colours in the background to show depth. Artists and inspiration names: Georgia O’Keeffe’s Red Hills and David Hockney’s Yorkshire landscapes as examples to look at together.
Step-by-Step Exemplar Slots
The centrepiece is a row of four framed photo slots, one per stage of the project, each with a coloured number dot, a step name, and a short instruction:
| Step | Name | Instruction |
|---|---|---|
| 1 | Sketch | Light pencil: horizon, three hills, a tree |
| 2 | Background | Cool colours: blues, greens, violets |
| 3 | Foreground | Warm colours: reds, oranges, yellows |
| 4 | Details | Oil pastel lines and texture on top |
Photograph your own example at each stage, then select each frame and choose Replace Image. The photo is cropped to the frame, so the layout stays tidy. When you project or print the plan, students see exactly what each stage should look like.
Session Plan
A real editor table divides the project into sessions, with minutes, activity, and materials: looking at the artists and sorting paint chips into warm and cool, sketching and painting the cool background, painting the warm foreground, and adding oil-pastel details followed by a gallery walk. It totals 90 minutes over two sessions. Edit it with Edit Table Data or add a third session with Add Row.
Rubric and Clean-Up
The rubric box lists four criteria worth four points each: warm and cool used for depth, a clear horizon, neat full colour, and effort and clean-up. The clean-up and vocabulary box reminds students where brushes go and lists the project words: warm, cool, foreground, background, and horizon.
Why Show the Stages?
Students who see only a finished artwork can feel overwhelmed. Showing the stages breaks the project into achievable steps and helps students who work slowly know what they should have finished by the end of each session. It also helps you spot misunderstandings early, such as a student painting the background warm.
Swatch Strip in the Footer
Six colour blocks along the bottom of the page repeat the palette’s paint colours, linking the bottom of the page to the top. Recolour them to the actual paints or pastels you will use, and the strip becomes a quick colour reference.
Projects That Fit This Layout
- Clay pinch pots: shaping, smoothing, adding texture, glazing.
- Collage portraits: sketch, cut shapes, layer, add details.
- Printmaking: carve, ink, print, sign and number.
- Observational drawing: contour, shading, texture, background.
Displaying the Plan
Many art teachers project the plan at the start of each session. The exemplar row becomes a visual instruction sheet, and the session table tells students what today’s goal is. Download as PNG for a slide, or Download As PDF to print and post it beside the sink.
Recolouring for Different Moods
The plum and coral palette is lively. For a calmer look, recolour the title, chips, and table headers to deep teal or charcoal, and swap the palette dabs to the colours used in your project. Every element is editable.
Talking About Art With Students
Looking at artworks together is as important as making them. Use a simple routine before students start: what do you notice, what do you wonder, and how did the artist make it? With the O’Keeffe and Hockney examples, students quickly notice the bright foregrounds and the hazy blue distances, which is exactly the idea the project teaches. Add your discussion questions to the inspiration box.
Managing Materials in a Busy Art Room
Paint projects need routines. Set up stations with paint in shared trays, water pots, and paper towels before the class arrives, assign table helpers to collect and return brushes, and leave the last eight to ten minutes for clean-up. Drying racks fill quickly; plan where wet work will go before the first student starts painting.
Assessing Creative Work Fairly
A rubric with clear criteria makes art grades fair and explainable. Focus on the skills the lesson taught rather than on whether a painting is pretty. In the sample, a student who uses warm and cool colours to show depth earns full marks for that criterion, even if their hills are wobbly.
Art Plan FAQ
Do I need photos for the steps?
No. You can leave the placeholder pattern, or delete the slots and write the steps as text.
Can I change the number of steps?
Yes. Delete a slot and spread the others out, or duplicate one for a fifth step.
What size is it?
US Letter, 8.5 x 11 inches.
Can I swap the palette for a different art tool?
Yes. Delete the palette group and add a brush, pencil, or clay icon from the SVG library; it inserts as an editable vector.
Can students see the plan?
Yes. Project it at the start of each session so they know which stage they should reach today.