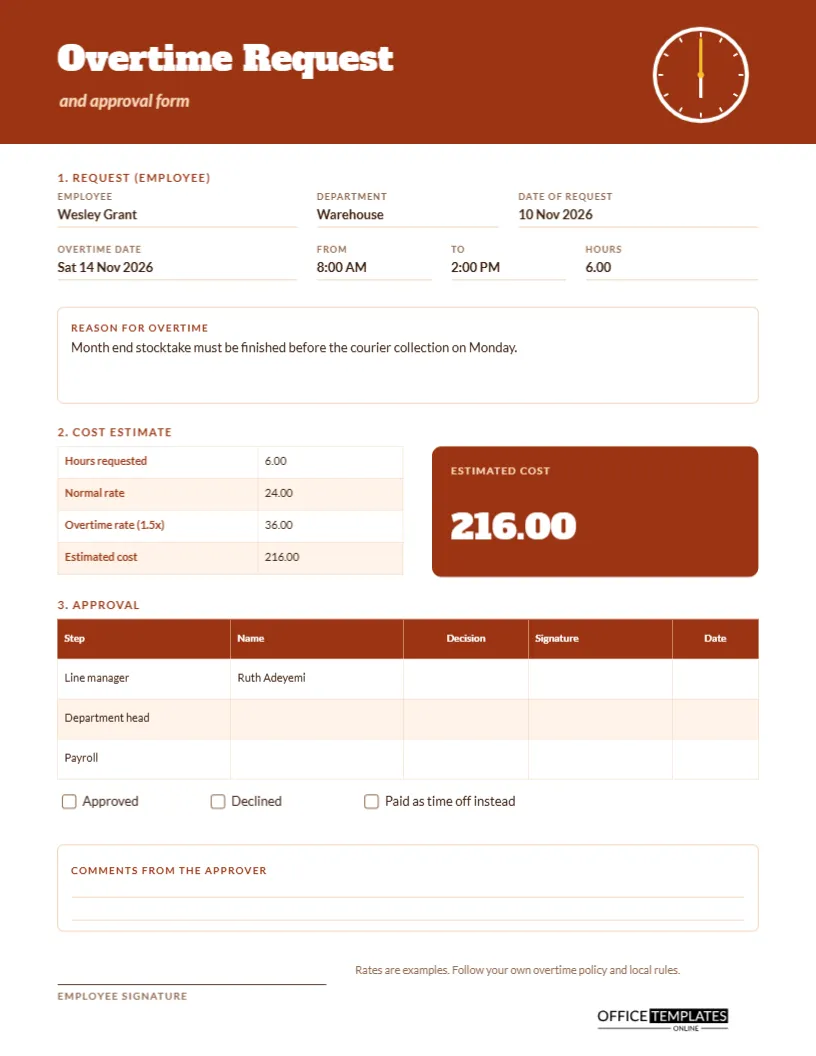
Unplanned overtime is one of the most common causes of payroll disputes. An employee works late, believing it was agreed. A manager is surprised by the bill. Nobody can point to a document. A request and approval form removes the doubt. It records who wants to work extra hours, on which date, for how long and why, what it will cost, and who said yes. This US Letter form arranges the whole process in three numbered steps.
Brick Red Header With an Alarm Clock Face
The header is brick red with a white clock face on the right showing six o’clock and a short amber hand. The title Overtime Request is set in Alfa Slab One, a heavy slab serif, and the words and approval form follow in a lighter italic. Lato sets the form fields. The strong typeface makes the form look official, which encourages people to take it seriously.
Step One: The Request
The employee fills in the first section: employee name, department, date of request, overtime date, start time, end time, and hours. The sample is Wesley Grant in the warehouse, who asked on 10 November 2026 to work on Saturday 14 November from 8:00 AM to 2:00 PM, which is 6.00 hours. Every request carries the date it was made, so you can tell whether approval came before the work.
The Reason Box
A reason box follows the fields. The sample reads: month-end stocktake must be finished before the courier collection on Monday. A clear reason makes approval faster, because the manager can weigh the business need against the cost. Vague reasons such as extra work lead to questions and delays, so ask employees to be specific.
Step Two: The Cost Estimate
| Item | Sample value |
|---|---|
| Hours requested | 6.00 |
| Normal rate | 24.00 |
| Overtime rate at one and a half times | 36.00 |
| Estimated cost | 216.00 |
A dark red tile repeats the estimated cost, 216.00, in large white numerals so that an approver sees it immediately.
Why an Estimate Before the Work
Cost awareness changes decisions. A manager who sees that six hours will cost 216.00 may approve at once, may ask for a shorter shift or may offer time off in return. An estimate made before the work turns overtime from a surprise into a choice. The form carries a small note that the rates are examples, and that you should follow your own policy and local rules.
Step Three: The Approval Table
A three-row table lists the approval steps: line manager, department head, and payroll. Each row has columns for name, decision, signature, and date. In the sample, the line manager is Ruth Adeyemi and the other names are left blank for completion. You can reduce the steps for a small business, or add a finance approval for large amounts.
The Decision Boxes
Three empty boxes sit below the table: Approved, Declined, and Paid as time off instead. The third option is practical, since many employers allow time off in lieu of pay, and it makes the choice visible. The approver ticks one, signs, and adds a comment if needed. Leaving the boxes empty on the sample shows the form as it looks when freshly submitted.
Filling in the Form in the Right Order
- The employee completes step one and signs at the bottom.
- The employee or manager works out the cost estimate.
- The line manager reviews, ticks a decision, and signs.
- If the cost exceeds a set limit, the department head signs next.
- Payroll records the approval and files the form.
- After the work, the actual hours are compared with the estimate.
Approving Before, Not After
The form works best when approval comes before the overtime. Say so in your policy: no approval, no overtime pay, except in emergencies. In an emergency, ask for the form to be completed the next working day. A clear rule avoids resentful arguments, and it protects employees who follow it.
Comments From the Approver
A lined box leaves space for the approver’s comments. Use it to explain a decision, set a condition such as finish by two o’clock, or suggest a different arrangement. Staff are more likely to accept a refusal if they receive a short, respectful reason in writing.
Overtime, Rest Time and Fairness
Before approving, consider the person’s total hours that week and their rest between shifts. Share overtime fairly, so the same few people are not always asked. A form with the date, hours, and name for every request makes a fair rotation easy to check at the end of the month.
Reviewing a Month of Requests
Put the approved forms in date order and add the hours and costs. The total shows what overtime really costs. If one department generates most of the requests, that is a clue about staffing levels. If the same task keeps causing late work, the process may need to change. The monthly overtime tracker in this collection summarises these numbers.
Editing the Rates and Approval Steps
All the text is editable. Change the multiplier from 1.5 to your own, replace the approval steps, and update the cost tile. The cost table is a real Table object, and the estimate is text, so retype the figures after any change. The clock graphic is built from shapes, and you can recolour or delete it.
Printing the Overtime Form and Filing Approved Copies
US Letter portrait. Print one form per request, or keep a stack at the supervisor’s desk. File approved forms with the weekly timesheet for the person concerned. Keep them for the period required by your payroll or tax authority.
Telling Employees How the Overtime Process Works
A form only helps if people know about it. Explain the steps at induction, pin a blank copy near the supervisor’s desk, and mention it whenever a busy period approaches. When staff understand that approval comes first, they plan, and managers stop receiving last-minute requests.
Overtime Request Questions
Is one and a half times the legal rate?
Not necessarily. The rate is an example. Use the rate that your contract and local rules require.
Can the employee fill in the cost?
Yes, but the manager should check it before signing.
What if the work takes longer than requested?
Record the extra time on the timesheet and ask the approver to confirm it in the comments.