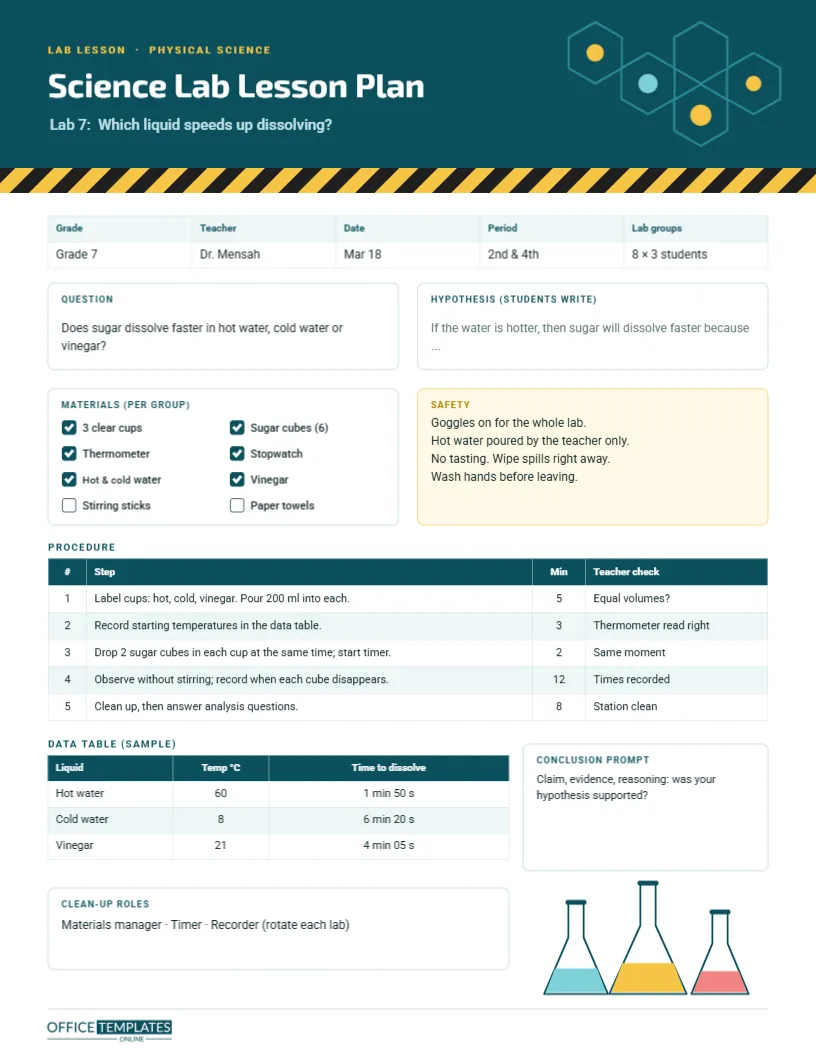
A lab lesson has more moving parts than almost any other kind of teaching. You need a clear question, a hypothesis students can test, materials counted out for every group, a safe procedure, somewhere to record data, and enough time left to clean up and draw a conclusion. Forget one of those and the lesson unravels. This Science Lab Lesson Plan Template keeps all of them on one page and makes safety impossible to miss, with a band of yellow-and-black hazard tape running right across the page under the header.
Header: Molecules and Hazard Tape
The top of the page is a deep teal band. On the right, five hexagons drawn in thin teal outlines form a molecule-like cluster, with yellow and pale-blue atoms at some of the corners. On the left, Science Lab Lesson Plan is set in white Exo 2, a technical-looking typeface, with the lab title underneath: Lab 7: Which liquid speeds up dissolving? Directly below the band, the hazard strip of diagonal black stripes on yellow divides the header from the plan.
Lab Details
A five-column strip records grade, teacher, date, the periods that will run the lab, and the group arrangement: eight groups of three students in the sample, taught by Dr. Mensah to Grade 7 on March 18.
From Question to Hypothesis
Two boxes sit side by side. The question box states what the lab investigates: does sugar dissolve faster in hot water, cold water, or vinegar? The hypothesis box is left for students, with a sentence starter in grey: If the water is hotter, then sugar will dissolve faster because … Leaving the hypothesis open is deliberate; students should commit to a prediction before they collect any data.
Materials Checklist
The materials box lists everything each group needs as tick boxes, in two columns: three clear cups, six sugar cubes, a thermometer, a stopwatch, hot and cold water, vinegar, stirring sticks, and paper towels. Ticked items are ready; unticked items still need preparing. Count materials per group the day before; nothing loses lab time faster than students waiting for a missing thermometer.
Safety Rules in a Box of Their Own
The safety box is tinted pale yellow with a gold heading so it stands out from the rest of the plan. The sample rules: goggles on for the whole lab, hot water poured by the teacher only, no tasting, wipe spills right away, and wash hands before leaving. Read these aloud at the start of every lab, even when the risks seem small.
The Procedure Table
A numbered procedure table gives each step, the minutes it should take, and what the teacher should check:
| Step | Action | Minutes | Teacher check |
|---|---|---|---|
| 1 | Label cups, pour 200 ml into each | 5 | Equal volumes? |
| 2 | Record starting temperatures | 3 | Thermometer read right |
| 3 | Drop 2 sugar cubes in each cup; start timer | 2 | Same moment |
| 4 | Observe without stirring, record times | 12 | Times recorded |
| 5 | Clean up, answer analysis questions | 8 | Station clean |
The teacher checks the column, turning the procedure into a walking checklist: as you circulate, you know exactly what to look for at each stage. Use Edit Table Data to write your own steps.
A Sample Data Table
Below the procedure, a smaller table shows students how their results should be recorded: liquid, temperature in degrees Celsius, and time to dissolve. The sample results show hot water at 60 °C dissolving the cubes in 1 minute 50 seconds, vinegar at 21 °C in 4 minutes 5 seconds, and cold water at 8 °C in 6 minutes 20 seconds. Sample data is useful when you demonstrate how to fill the table, or as a back-up set for a group whose experiment fails.
Conclusion and Clean-Up Roles
A conclusion prompt box asks students to use claim, evidence, and reasoning to decide whether their hypothesis was supported. A clean-up roles box assigns jobs (materials manager, timer and recorder, rotating each lab), because clean-up goes faster when everyone has a defined job.
Three Flasks in the Footer
In the bottom-right corner, three Erlenmeyer flasks with teal outlines hold liquids in pale blue, yellow, and coral. They echo the molecule cluster at the top and finish the page with a friendly science touch. They are one group, so they can be recoloured or removed.
Variables Worth Discussing
Use the plan to make variables explicit. In the sample, the independent variable is the liquid and its temperature, the dependent variable is the time to dissolve, and the controlled variables are the volume of liquid, the number of cubes, and no stirring. Add a line to the question box if you want students to name all three before they begin.
Adapting for Other Labs
The structure fits chemistry demonstrations, biology dissections, physics experiments, and engineering challenges. For a dissection, the safety box covers sharp tools and gloves; for a circuits lab, it covers batteries and heat. Rename the data table columns to whatever students will measure.
Printing and Keeping Lab Records
Download as a PDF and print a copy for your lab folder. Many schools ask science teachers to keep records of risk assessments and safety briefings; a dated lab plan with safety rules is a simple way to show they were covered. The teal header prints well in colour; in black and white, the hazard strip still reads clearly.
When an Experiment Fails
Experiments do not always work: thermometers break, water cools too fast, a group stirs when they should not. Treat it as part of science. Ask the group what went wrong and how they would change the method, then share the sample data so they can still complete the analysis. That conversation often teaches more about fair testing than a perfect result would.
Lab Plan FAQ
Can students use the data table?
Yes. Delete the sample values and print the page as a lab sheet.
Can I add more safety rules?
Yes. The safety box text is editable; resize the box if you need more lines.
What size is it?
US Letter, 8.5 x 11 inches.