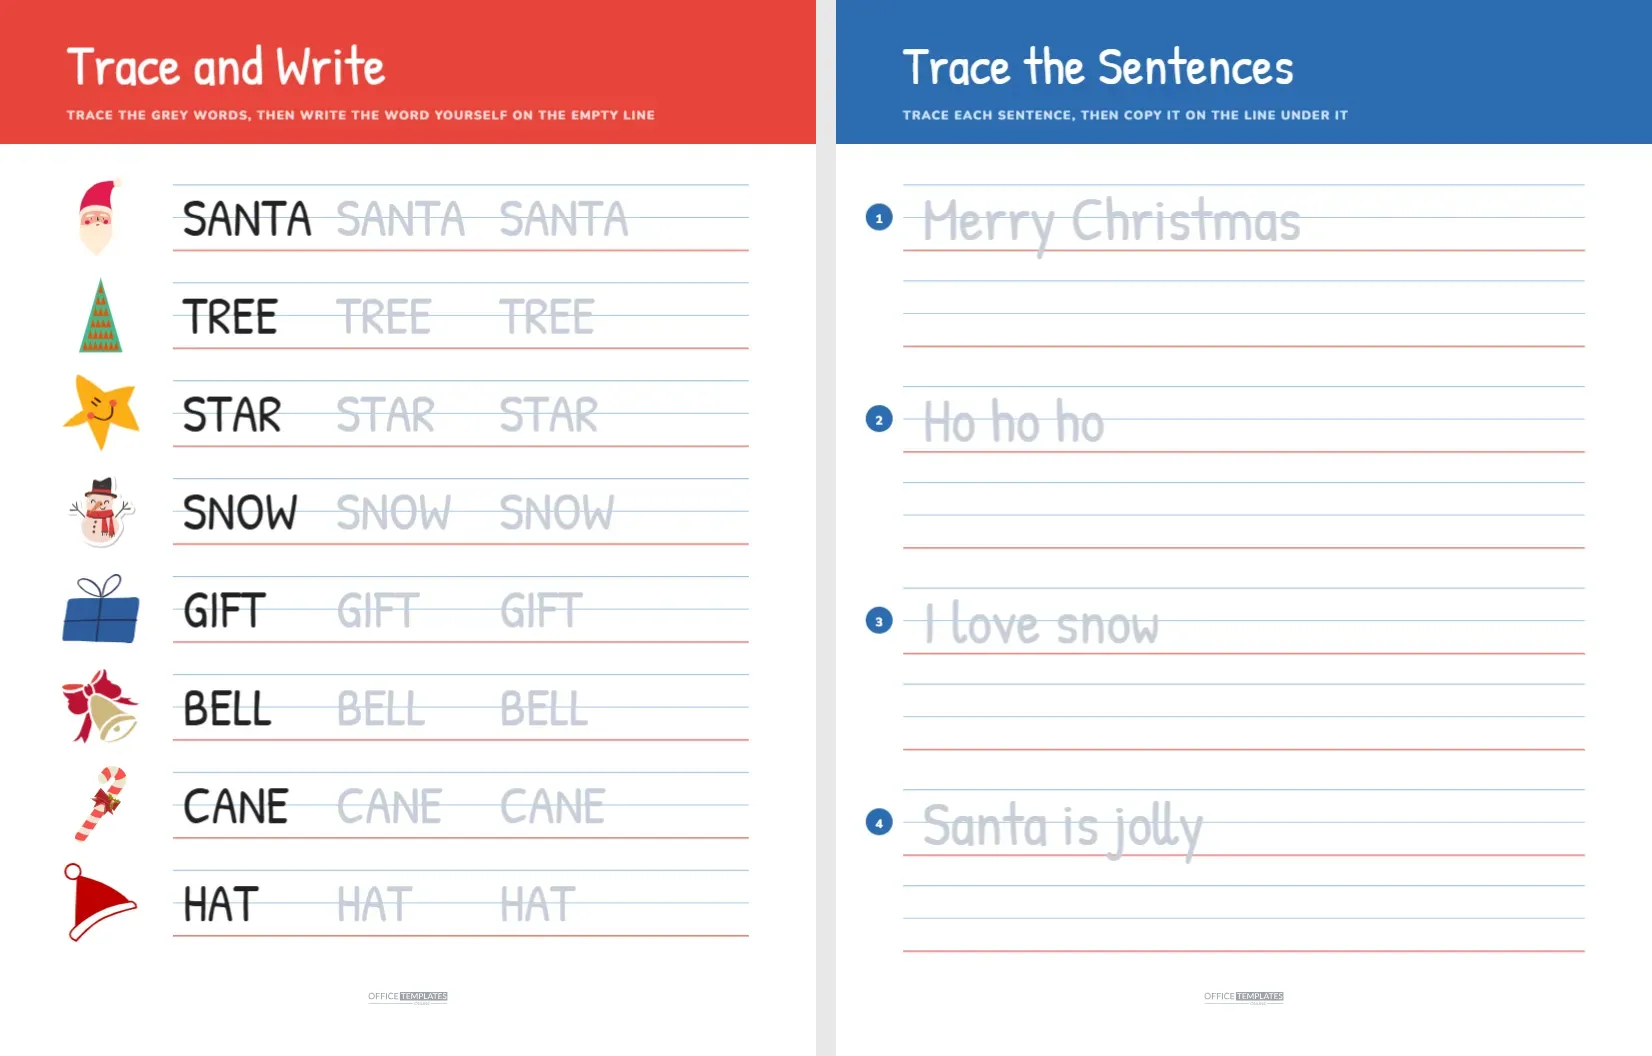
Handwriting practice is easier when the words are ones a child wants to write. Santa, snow and star are far more fun than random letters. This sheet gives young writers eight Christmas words, each with a picture, a model to follow, two grey copies to trace and an empty line to write alone, and a second page of four short sentences.
One Row, Four Steps
Every row on page one follows the same pattern, so a child knows exactly what to do. First, look at the picture on the left, which tells you what the word means. Second, read the dark model word. Third, trace the two light grey copies with a pencil. Fourth, write the word yourself on the empty line at the right. The progression moves from copying to independent writing, a method teachers use for early handwriting.
Eight Words and What They Practise
| Word | Picture | Letters to watch |
|---|---|---|
| SANTA | Santa’s face | The curved S and the pointed A |
| TREE | A green tree | The tall T and the double E |
| STAR | A smiling star | The S, T and R in sequence |
| SNOW | A snowman | The curves of S, N and O |
| GIFT | A blue gift box | The round G and the straight F and T |
| BELL | A gold bell | The B with two bumps and the double L |
| CANE | A candy cane | The round C and the pointed N |
| HAT | A Santa hat | The H crossbar and the A peak |
The Guide Lines Explained
Behind every row, three lines tell the child where letters live. A thin blue line near the top marks the tall letter height. A dashed blue line in the middle marks the height of small letters, and a red line below is the baseline on which letters sit. Capital letters reach the top line and rest on the red line. Because the sheet uses capitals, the middle line is only a guide, but it prepares children for lowercase writing. Page two uses the same lines for mixed case sentences.
Page Two, Four Sentences
The second page has a blue band with the title Trace the Sentences. Four numbered rows each hold a short Christmas sentence in large light grey letters: Merry Christmas, Ho ho ho, I love snow and Santa is jolly. Under every sentence, another pair of guide lines gives the child a place to copy it. Sentences are the next step after words, and they bring in spaces, capital letters at the start and a mix of tall and short letters.
Tips for Holding a Pencil
- Sit with both feet on the floor and the paper tilted slightly.
- Hold the pencil between the thumb and the first two fingers, not too near the point.
- Rest the wrist on the table so that the hand moves smoothly.
- Start each letter at the top where possible and move downward.
- Pause after each word and look at it to decide if it sits on the red line.
Making Practice Short and Happy
Young hands tire quickly. Aim for two or three rows at a time and finish while the child is still keen. Celebrate the best letter in a row rather than pointing out the worst. Use a coloured pencil for tracing, which adds interest, and give a sticker for each completed row. A short daily session is more valuable than a long one once a week, and eight words give a full week of five minute practice.
Swapping In Your Own Words
Every word is an editable text box. Replace the eight words with a child’s name, family members, spelling words from school or words in another language. Keep each word to about six letters so that it fits the row. To make the grey trace words, set the colour to a light grey, and use the same font size as the model. The pictures can be swapped for other stickers from the library by deleting one and inserting another. Because the guide lines belong to a separate group, they stay put when you change the text.
Where This Sheet Helps Most
- Preschool and reception classes learning letter formation.
- Home practice for children who find writing tiring.
- Occupational therapy sessions that focus on grip and control.
- English learners who need to see and copy the letters of new words.
- Holiday boredom, when a quiet task is welcome.
Printing the Tracing Sheet
Print on plain white paper for pencil work. For repeated use, slip the page into a clear sleeve and use a dry erase marker, then wipe clean. The grey trace words print lightly, so children can see their own pencil marks on top. The coloured band at the top uses little ink, and the guide lines are thin. If you plan to print many copies, check that the light grey is still visible on your printer, and darken it a little if it is not.
Linking Handwriting to Reading
When a child writes a word, they also learn to read it. Ask the child to say each word aloud before and after tracing, and to point to each letter as they name its sound. Link the word to the picture again at the end, so the meaning stays attached to the shape of the letters. Many early readers recognise words by their shapes first, such as the tall T in TREE and the two humps of the B in BELL. A handwriting page turns into a reading lesson without changing a single line.
Building a Daily Routine
Choose a regular time for a few minutes of handwriting each day, such as after breakfast or before bed. Place the page, a sharpened pencil and a small cup of crayons on the table so everything is ready. Trace one or two rows, say the words and stop. Over eight days a child will have written each Christmas word several times, and the letter shapes will start to feel familiar. Keep the finished rows in a folder so that the child can see how neat the letters have become.
Handwriting Questions
Can the sheet teach lowercase letters?
The words on page one are in capitals, while page two includes lowercase letters inside the sentences. Edit the words to lowercase for more practice.
Why are the trace words in a handwritten typeface?
A simple handwriting style is closer to what children write than a formal printing font, and it makes the shapes easier to copy.
How long does the page take?
A child usually needs ten to fifteen minutes for the whole of page one if they are not rushed.