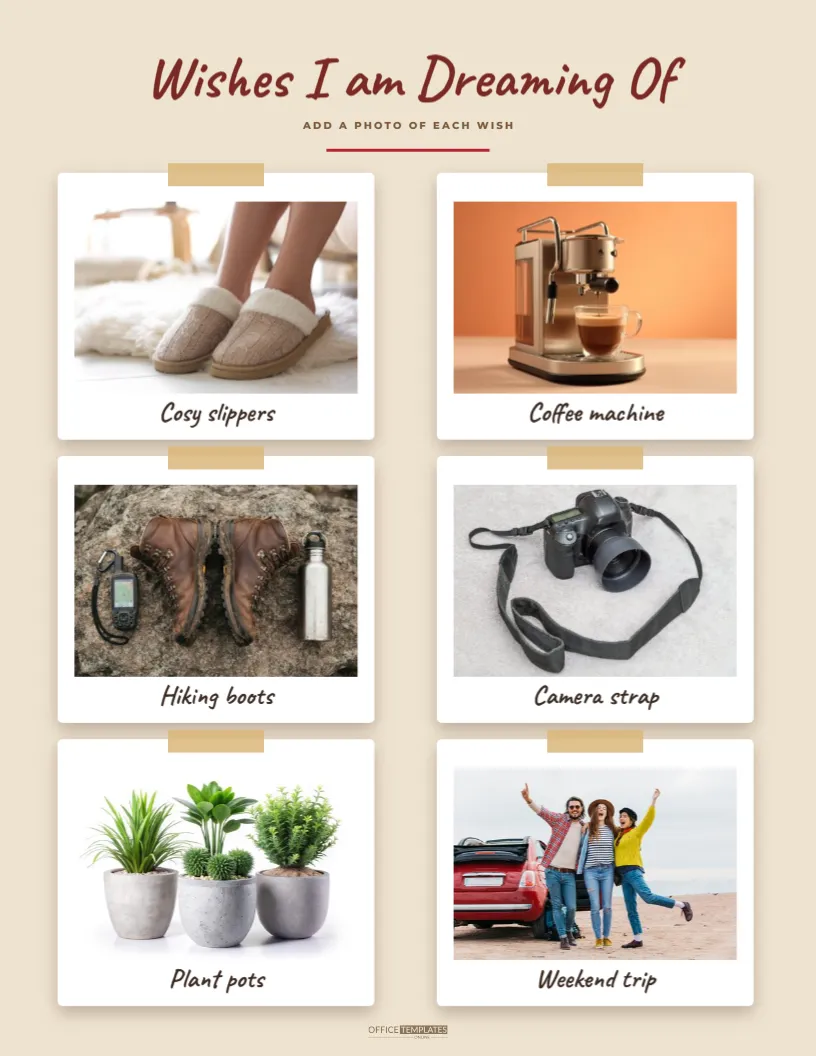

A picture says what a word cannot. This wish board turns a list into a collage: six Polaroid-style cards, each with a photo slot and a handwritten caption, scattered on warm kraft paper. Add pictures of the things you want, from slippers to a weekend trip, and the result is a page that people enjoy looking at as well as shopping from.
How the Page Is Built for the Polaroid Wish Board List
The background is a soft kraft beige. A title written in a casual brush style, Wishes I am Dreaming Of, runs across the top in dark red, with a small line in spaced capitals, ADD A PHOTO OF EACH WISH, beneath it. A short red rule follows. Six white cards stand in two columns of three, each with a soft shadow and a small strip of tape at the top, and each card holds a large photo slot with a caption under it.
Adding Your Pictures
- Click a photo slot in the editor.
- Choose Replace Image and pick a picture from your device.
- Move or zoom the picture inside the frame until the item is centred.
- Click the caption and type the name of the wish.
Every slot keeps its size and position, so the board stays neat whatever the picture shape. Product photos from a shop page work well, and so do screenshots or your own snapshots.
Where to Find Good Pictures
Save images from the shop where the item is sold, or take a photo of something you have seen in a window. For experiences, such as a weekend trip, use a picture of the place. For handmade gifts, take a photo of a similar item. Keep the pictures bright and simple, so that the board looks tidy.
The Six Captions
| Position | Sample caption | Idea |
|---|---|---|
| Top left | Cosy slippers | A small comfort item |
| Top right | Coffee machine | A household upgrade |
| Middle left | Hiking boots | A bigger practical gift |
| Middle right | Camera strap | An accessory for a hobby |
| Bottom left | Plant pots | A garden or home wish |
| Bottom right | Weekend trip | An experience |
Mixing Sizes and Budgets
A good board mixes something small, something useful, something special and something to share. That way relatives with different budgets can all find a place. If you want to give prices, add them to the caption in a small size, or leave them out and put a price range in a message when you send the board.
Who Will Love This Layout
Teenagers like it because it looks like a social media collage. Parents like it because they can see exactly what the item looks like. Grandparents like it because they can show the picture to a shop assistant. It is also helpful for people who are shy about asking for things, because the pictures do the asking.
Printing and Sharing for the Polaroid Wish Board List
- Print on matt photo paper for the best colour in the pictures.
- For a wall display, print on card stock and pin the board with washi tape.
- Export as an image for chats, and as a PDF for emails.
- Print a few copies and give one to each relative.
Questions About the Wish Board
Can I use fewer than six photos?
Yes. Delete a card or leave its slot empty and write a note instead.
Can I change the kraft colour?
Yes. Select the background and choose a new colour, such as soft grey or pale pink.
Which fonts are used?
A casual brush face for the title and captions, and a spaced sans for labels.
Do the photos print sharply?
Use pictures at least 1000 pixels wide for a crisp print.
A Board for the Whole Family
Print one board for each person, or ask each family member to choose two cards on a shared page. Place the finished boards side by side on a wall for a cheerful display. Update them as gifts are bought by adding a small tick.
Keeping a Memory of the Year
After Christmas, take a photo of the board and file it. Looking back later, you will see what you wanted and what you received, and it will remind you of the year. Boards like this make a lovely entry in a family album.
Making the Collage Look Professional
Use pictures with a similar style: all product shots on white, or all warm lifestyle photos. Mixed styles can look messy. Crop each image so that the item sits in the middle, and avoid very dark pictures. If a photo has a busy background, zoom in so that only the item shows. A little care turns a simple board into something that looks designed.
Handwriting Captions in Print
The caption style imitates a pen on a polaroid. If you would rather write by hand, delete the caption text and print the board, then write with a marker. A fine black marker works well on matt paper. Handwriting makes the board personal and it looks lovely when children write the captions.
Using the Board for Gift Swaps and Parties
At a party, ask each guest to bring a board and pin the boards on a wall. People can see each other’s wishes and choose small gifts. A wish board is also a good activity for a family evening, with pictures cut from catalogues, a glue stick and a pair of scissors for those who prefer paper to screens.
Alternative Themes for the Board
Use the same layout for a birthday wish board, a travel dream board or a wedding wish list by changing the title and the captions. Replace the kraft colour with a favourite shade, such as blue for a baby boy or sage for a calm look. Because the layout is made of simple shapes, you can adapt it in minutes without losing the polaroid charm.
Tips for a Tidy Final Print
Before printing, zoom in to check that every photo is sharp and every caption fits on one line. If a caption is long, shorten it or reduce its size. Print a test page on plain paper, then print the final copy on better paper. A short check saves a good sheet and keeps the board looking crisp.