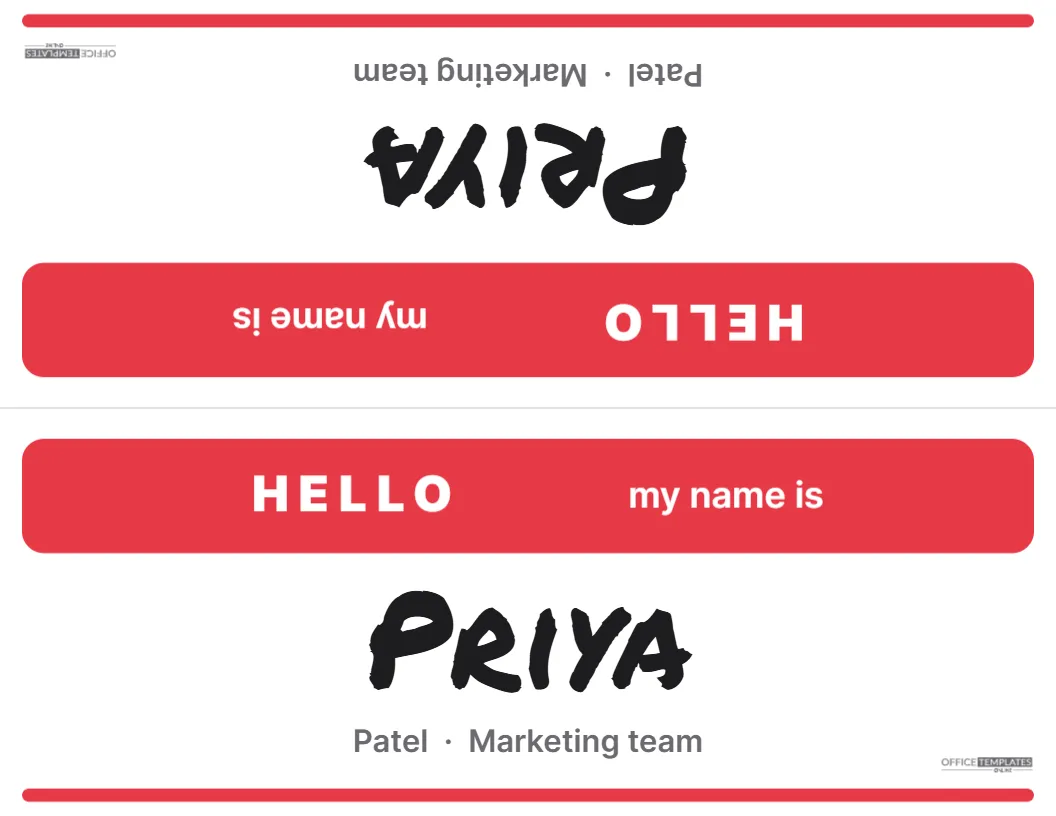
Everyone knows the red Hello my name is sticker. It is friendly, informal, and instantly understood, which is why it remains a favourite at workshops, training days, networking events, and classrooms. This name tent takes that familiar look and makes it big enough to read across a room. A bold red header reads HELLO my name is, the first name is written underneath in a chunky marker font, and a smaller line adds the surname and team. Printed on a letter sheet and folded lengthwise, it shows the same name on both sides.
Sticker Style, Tent Size
The sheet is 11 x 8.5 inches in landscape, folded along a dashed line into a two-faced tent, each face 11 x 4.25 inches. The upper face is printed upside down so that both faces read correctly once folded. Each face has a red rounded rectangle near the fold with HELLO in heavy white capitals, and my name is in white beside it, just like the classic sticker. Below it, the first name Priya is set very large in Permanent Marker, a handwritten marker font, in near-black. A smaller grey line underneath reads Patel · Marketing team, and a red bar runs along the bottom edge. A small logo sits in a corner of each face.
Why First Names First
At workshops and trainings, people work in small groups and need to call each other by name quickly. A huge first name is far more useful than a full name in small type. The surname and team go on the smaller line for context, which also helps facilitators who are grouping people or taking attendance.
Filling In Both Halves
- On the lower half, type the first name over Priya.
- Edit the smaller line with surname and team, department, or table group.
- Make the same changes on the upper half, which is rotated; click into the text boxes and type normally.
- Download the sheet and continue with the next participant.
Permanent Marker is wide; first names up to about ten letters fit at the current size, and longer names need a slightly smaller size.
Ideas for the Second Line
| Event | Second line |
|---|---|
| Corporate workshop | Surname · Team |
| Training course | Surname · Group B |
| Networking event | Company · Ask me about AI |
| Classroom | Surname · Grade 6 |
| Community meeting | Neighbourhood · Volunteer |
| Hackathon | Team name · Role |
The Ask me about line is a great icebreaker at networking events; it gives strangers a ready topic.
Changing the Header Colour
The classic sticker is red, but the header is a simple rounded rectangle, so you can change it to any colour. Use different colours to group participants: red for the sales team, blue for engineering, green for marketing, or one colour per breakout group. Change the bottom bar to match. The white HELLO text stays readable on any strong colour.
Handwritten Option
Some facilitators prefer participants to write their own names, as with the original sticker. Delete the name and second line on both halves, print a stack of blank tents, and put them on tables with thick markers. Participants write their own name as they arrive, a small act that helps them feel at home.
Printing Red Headers on Letter Cardstock
Print on letter-size cardstock of 65 to 80 lb cover, which folds lengthwise cleanly and stands well. Print at actual size. The red header and bar print well on any colour printer. For black-and-white printers, the header prints dark grey with white text, which still looks good.
Folding Into a Standing Tent
Score along the dashed fold line with a ruler and fold so both printed faces are on the outside. Stand the tent on the table with one face towards the participant’s colleagues and the other towards the facilitator. Fold the outer edges inward an inch for a wider, steadier base if tables are crowded.
Facilitator Tips
Use name tents from the first minute: they speed up introductions and help facilitators call on people by name. Ask participants to place their tent so the facilitator can see it from the front. At the end of the day, collect the tents and reuse the blank ones for the next session.
Classroom Use
Teachers often use name tents at the start of the school year, in substitute lessons, and in university seminars. Students can decorate the blank space around their name, which doubles as a getting-to-know-you activity. Keep the tents on desks for the first few weeks until everyone knows each other’s names.
Icebreakers Built Around the Name Tent
A name tent can do more than show a name. Ask participants to add one word on their tent that describes them, a favourite food, or the city they grew up in. Start the session with a quick round where each person reads their own word aloud. In a training of twenty people, it takes five minutes and gives everyone something to remember about each other. For longer workshops, have people pair up with someone whose tent shows the same colour header.
Printing Many Tents Quickly
For a training with many participants, prepare all tents the evening before. Create one sheet per person, save the files in order, and print them as a single batch. If you have a list of names in a spreadsheet, keep it open beside the editor and copy names across one by one. Have a pack of blank tents on the welcome table for walk-ins.
Name Tent Questions
Why is the top half upside down?
So that both faces read correctly once the sheet is folded into a tent.
Can I add a company logo?
Yes. Add the logo to both halves, rotating the upper one to match.
What size is each face?
11 x 4.25 inches.
Can I print it in blue instead of red?
Yes. Recolour the header and bottom bar on both halves; the white text stays readable.
Will Permanent Marker be readable from far away?
Yes. At this size, first names are easy to read across a typical training room.