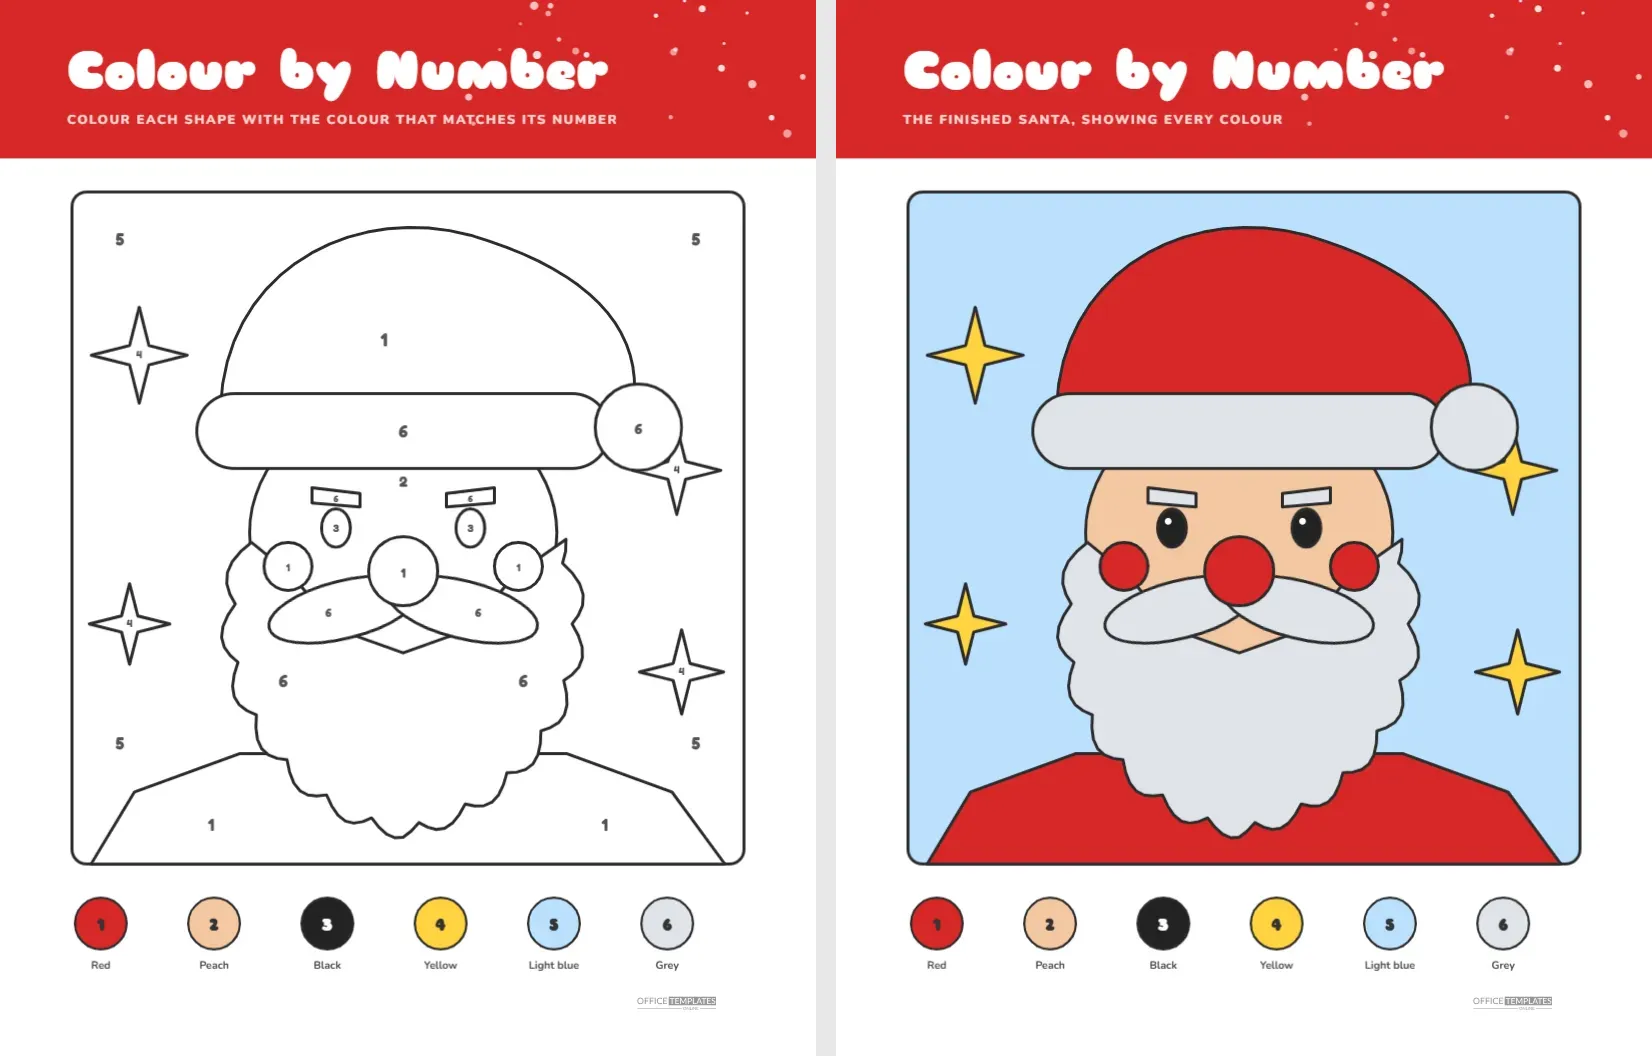
Colour by number turns a blank outline into a puzzle. Each shape carries a small number, the key at the bottom says which colour goes with which number and the finished picture appears as the shapes fill in. This Santa Claus page uses six numbers and a simple face, so that children can finish it in one sitting.
What the Picture Contains
| Number | Colour | Shapes that use it |
|---|---|---|
| 1 | Red | The hat, the coat, the nose and two round cheeks |
| 2 | Peach | The face |
| 3 | Black | The two eyes |
| 4 | Yellow | Four sparkling stars in the corners |
| 5 | Light blue | The background of the whole picture |
| 6 | Grey | The pom pom, the hat band, the eyebrows, the beard and the moustache |
Where Everything Sits on the Page
A red band with a scattering of white snow dots frames the top, with the title Colour by Number in a bold rounded face and a gold line explaining the task. The picture takes up the middle of the page inside a rounded square: a large Santa hat drooping to the right with a round pom pom, a white hat band, a face with eyebrows, eyes, a round nose and cheeks, a fluffy scalloped beard, a curled moustache and the top of a red coat. Four small four pointed stars float in the corners. At the foot of the page, six coloured circles carry the numbers and colour names as a key.
How to Colour Without Getting Lost
- Look at the key and say each colour out loud with its number.
- Start with the biggest area, the light blue background marked 5.
- Next, colour the hat and the nose with red, using number 1.
- Colour the face peach and the eyes black.
- Finish the grey areas, the beard, moustache, band and pom pom.
- Add the yellow stars last, since they sit on top of the blue background.
Number Skills and Colour Skills Together
Colour by number combines number recognition with careful colouring. A child must read the number, find the matching colour in the key and apply it inside the lines. That loop builds attention and accuracy. The six colour limit keeps the task simple for beginners, who do not have to switch between twenty crayons. Older children can add shading, using a darker tone along the edges of the beard or a lighter tone on the cheeks.
Checking Against the Finished Santa
Page two repeats the same Santa with every shape already filled in: a red hat, a grey pom pom, a peach face with black eyes and red cheeks, a grey beard and moustache, a red coat and a light blue background with yellow stars. The numbers are hidden on this page, so the picture looks like a finished illustration. Children can compare their own picture with it, or colour a second copy freely using the first as a guide.
Why There Are So Few Colours
Real Santa pictures often contain dozens of shades. This page uses six because beginners lose the thread when there are too many choices. If a child asks for extra colours, let them add details on top, such as a pink inside the cheeks or a dark outline around the eyes. After finishing the page, ask them to colour a second copy with their own colour plan. A blue Santa or a rainbow beard is just as good as the classic version and often leads to laughter.
Editing the Picture and the Key
Every shape on the page is a vector polygon or circle, and the numbers are text boxes. To change the key, click a number on the page and type a different one, then edit the key at the bottom to match. To make the picture harder, split a large shape into two and give each part a different number. To make it easier, delete a number from a shape and use the same colour for all adjoining areas. The finished picture on page two uses fills that match the key, so update both pages together.
Crayons, Pencils or Markers
Crayons give a soft, waxy finish and suit young children. Coloured pencils allow shading and keep the numbers visible through a light coat. Markers produce bright, flat colour, but may bleed on thin paper. If you plan to use markers, print the page on a heavier stock and place a sheet underneath. Avoid dark colours over the small numbers, since they will cover them and make later checking harder.
Ideas for Using the Page
- Class warm up: give each child a copy and compare finished pictures at the end.
- Quiet corner: keep a stack of pages and a tin of crayons for children who finish early.
- Greeting card: colour, cut out and glue the picture onto folded card.
- Number practice: ask the child to say each number aloud before colouring.
Building Confidence Through Small Wins
Many children who say they cannot draw feel at ease with colour by number. The shapes are drawn for them and the colours are chosen for them, so the only task left is to follow instructions carefully. That gives a quick sense of success, and a finished picture that looks professional. Parents can use the page to build the habit of finishing a task before starting another. Praise the effort and the care taken with the edges, rather than only the result, since that is what children can control next time.
A Second Round With a Free Palette
After colouring by the key, print a fresh copy and ask the child to pick their own colours for every number. A purple Santa on a pink sky, or a green hat and yellow beard, often gives the funniest results. Compare the two versions side by side and talk about which they prefer and why. The exercise teaches that colours change the mood of a picture, a first step toward understanding art and design.
Colour by Number Questions
What age is it for?
Children from about five can enjoy it. Those who cannot read numbers yet can match the colour of the circle in the key by sight.
Why is the grey used for the beard instead of white?
White paper stays white, so a pale grey gives children something to colour and still looks like a beard.
Can I print only the picture without the key?
Yes. Delete the key circles in the editor if you want a plain numbered picture with your own key written on the board.