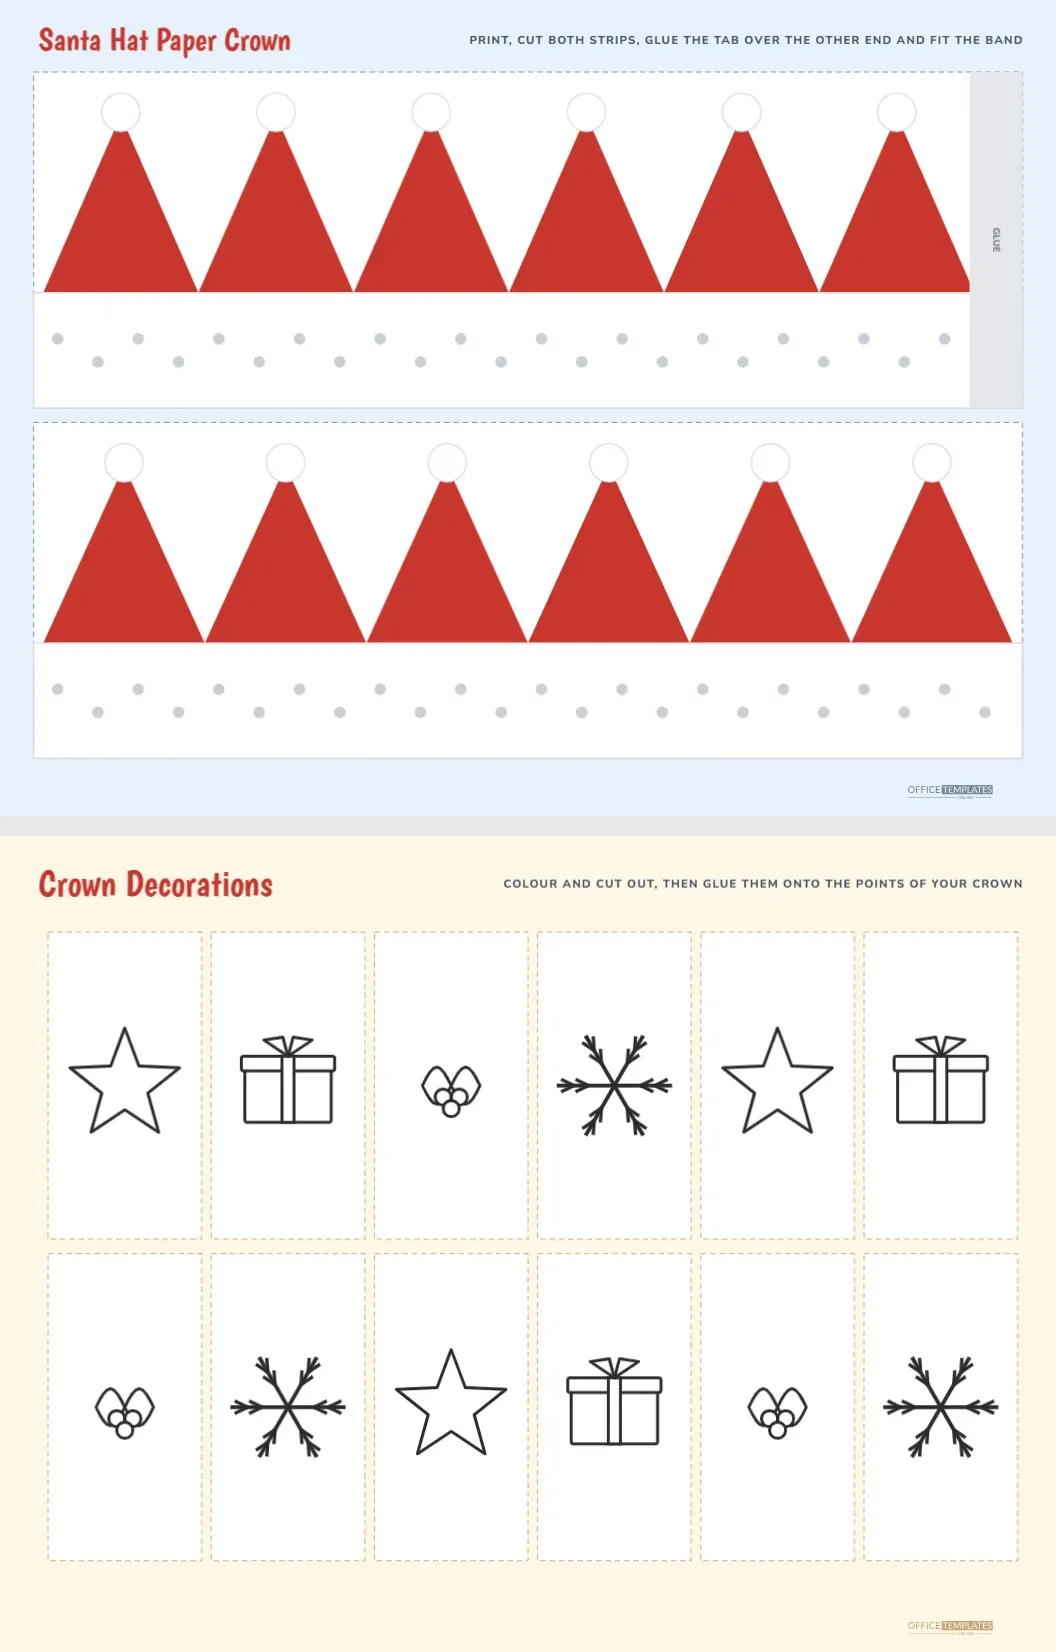
Santa hats are the simplest costume at a Christmas party, and a paper crown is the simplest hat. This landscape page prints two long strips, each with a row of red triangle points and a fluffy white band, that join into a crown that fits a child’s head. A second page holds twelve decorations to colour and glue onto the points.
How the Strips Fit Together
| Part | Size | Purpose |
|---|---|---|
| Strip one | About 10.3 by 3.5 inches | The front half, with a grey glue tab at the right end |
| Strip two | About 10.3 by 3.5 inches | The back half, which slides under the tab |
| Fur band | 1.2 inches tall on each strip | The white base that sits on the forehead |
| Hat points | Six on each strip | Twelve points around the finished crown |
Together the two strips make a band of just over twenty inches, and the overlap at the tab takes a little off that. That fits most children comfortably. For a larger head, cut a third strip from card and tape it between the two.
The Design on Page One
The page is landscape, eleven inches wide and eight and a half tall, on a pale blue background. A title in a bold rounded face reads Santa Hat Paper Crown on the left, with a short line of capitals on the right that explains the steps. Both strips are white with a dashed cutting line. Six tall red triangles stand along the top of each strip with a small white pom pom at the tip of each one. Under the points, a white band with a thin pale grey edge is dotted with tiny grey specks to suggest fluffy fur. The first strip has a grey tab at its right edge labelled GLUE.
Making the Crown in Seven Steps
- Print page one on card stock if you can, or on regular paper, and cut out both strips along the dashed lines.
- Colour the red points and the white band if you wish, or leave them as they are.
- Lay the strips end to end, with the tab of the first strip over the left end of the second.
- Glue the tab and press the two strips together.
- Wrap the strip around the child’s head to check the fit.
- Glue or tape the last end under the free tab of the first strip.
- Decorate the points with stickers or the decorations from page two.
Page Two, Twelve Decorations to Colour
The second page is a warm cream sheet with the title Crown Decorations and a note that the pieces are for gluing onto the points of the crown. Twelve tall dashed cards in two rows of six each hold a small outline picture: a star, a wrapped gift, a sprig of holly or a snowflake, repeated three times each. Children colour the pictures, cut them out and glue them wherever they like on the points or the band. A child who wants a very fancy crown can stick several decorations on each point.
Colour Schemes for the Hat Points
- Traditional: leave the points red and colour the stars gold and the holly green.
- Candy cane crown: draw red and white stripes on the points.
- Icy crown: colour the points pale blue and add silver glitter to the fur.
- Rainbow crown: use a different colour for each of the twelve points.
- Name crown: write the child’s name on the white band with a marker.
Party Planning With Paper Crowns
Crowns are a perfect activity for a Christmas party because they keep children busy, give them something to wear and make a joyful group photograph. Set up a craft table with printed strips, scissors, glue sticks, crayons and a pile of stickers. Allow thirty minutes for children to make their crowns, and have an adult standing by to fit each band. For a class party, print the strips on card and pre cut them in advance, so the children only need to colour and glue.
Skills Behind the Hat
A crown has a few steps and a clear goal, which suits school age children. They practise measuring by eye, as they wrap the band around their head, and joining pieces together neatly. Colouring the points trains fine motor control, and choosing decorations builds design sense. The finished crown has immediate value: it can be worn, photographed and taken home. Children are proud of things they can use, and a crown is both a craft and a costume.
Editing the Crown
The points, the pom poms and the fur band are all vector shapes. Recolour the red triangles to green and the band to gold for an elf crown, or to blue and silver for a winter theme. To add a name or a message, use the text tool to place a word on the band. If you want a taller crown, stretch each strip vertically and keep the aspect of the points. The glue tab is a plain rectangle that you can move to either end. For a smaller crown, shorten both strips and delete one point from each.
Printing Landscape Pages
Choose landscape orientation in the print dialogue and turn off page scaling so the strips print at full size. If your printer leaves a margin, a small white strip may show on the right edge, but the tab has plenty of room to spare. Card stock around 160 gsm gives a crown that holds its shape without being hard to cut. Thin paper is fine for a one afternoon crown at a party.
Crown Craft Questions
Will it fit an adult?
Two strips make a band of about twenty inches. Add a third strip cut from card to reach the size of an adult head.
Can I use a stapler?
Yes. A staple at the overlap is the fastest fix and can be covered with a sticker.
Why does the page show only six points on each strip?
Six points make a wide, easy to cut shape. For smaller, more numerous points, scale the triangles in the editor.