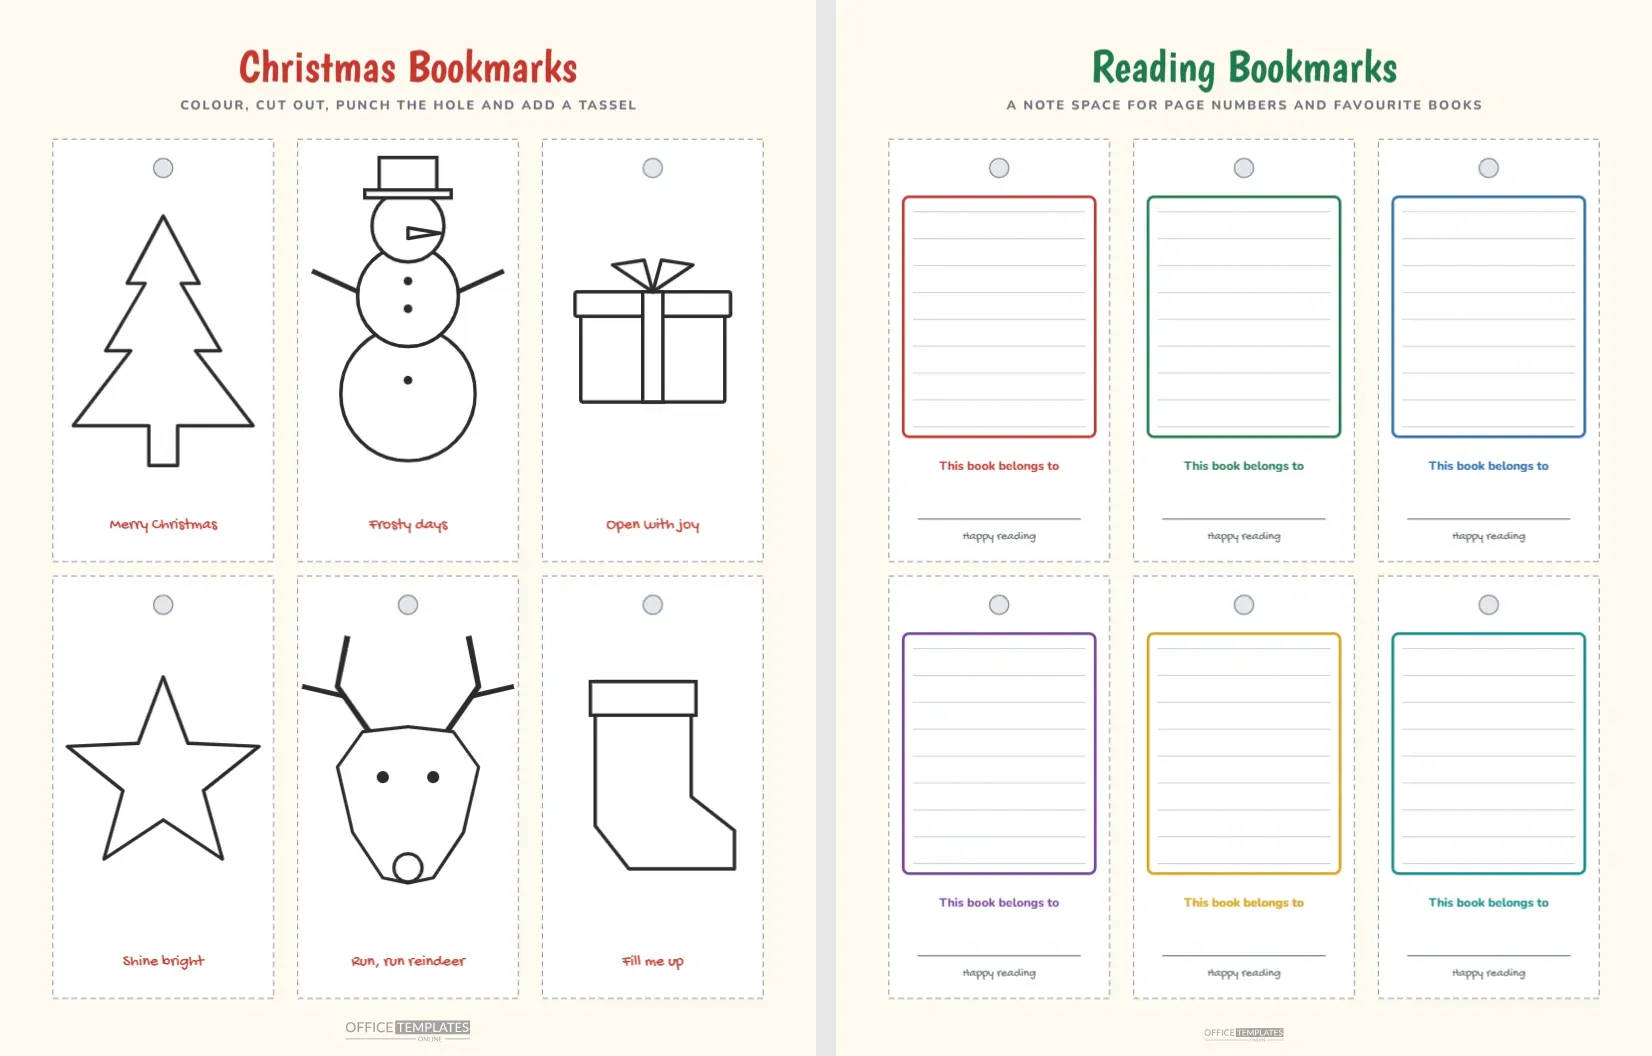
Books and Christmas go together, and a bookmark is the perfect small gift. These printable bookmarks give children a long thin canvas for a tree, a snowman, a gift, a star, a reindeer or a stocking, and a second page of bookmarks with lines for notes. Colour, cut, punch a hole and tie a tassel.
Six Designs, Six Captions
| No. | Picture | Caption at the foot |
|---|---|---|
| 1 | A tall Christmas tree with a trunk | Merry Christmas |
| 2 | A snowman with a top hat and a twig arm on each side | Frosty days |
| 3 | A wrapped gift with a bow | Open with joy |
| 4 | A big five pointed star | Shine bright |
| 5 | A reindeer face with antlers and a red nose | Run, run reindeer |
| 6 | A stocking with a cuff | Fill me up |
What a Single Bookmark Looks Like
Each bookmark is two and three tenths of an inch wide and four and four tenths tall, a good proportion for slipping into a paperback. A dashed grey line marks the cutting edge. A small grey circle near the top shows where to punch a hole for a tassel or ribbon. The picture sits in the middle in a bold dark outline with a white fill, and a short caption in a handwritten red face runs along the bottom.
Page Two, Note Bookmarks
The second page has the same six shapes but a different purpose. Each bookmark carries a coloured border in red, green, blue, purple, gold or teal, and inside the border are nine faint ruled lines for page numbers or short notes. Near the bottom, the words This book belongs to are followed by a line for a name and the words Happy reading. These bookmarks make a perfect present for a classmate, a teacher or a library friend, since each one is personal.
Making a Bookmark in Six Steps
- Print on card stock, or glue the printed paper to thin card.
- Colour the picture with pencils, markers or crayons.
- Cut along the dashed line with scissors or a paper trimmer.
- Punch a hole at the grey circle with a hole punch.
- Cut a piece of ribbon, yarn or embroidery thread about twelve centimetres long, fold it in half and push the loop through the hole.
- Pull the ends through the loop to make a tassel and trim the ends neatly.
Colouring Ideas for Each Design
The tree suits a classic green, or a pattern of stripes with a few baubles. The snowman works in blue and white with a bright scarf drawn on the neck. The gift can take any colours the child loves, with a metallic pen on the bow. The star looks bright in yellow and orange with a little glitter. The reindeer needs brown, a shiny red nose and a splash of white around the muzzle. The stocking is a chance for stripes, hearts and tiny presents peeking over the cuff.
Bookmarks as Gifts
Bookmarks make a thoughtful present that costs very little. A child can make a set of six for classmates, tie them with a ribbon and tuck a short note inside. Teachers appreciate a handmade bookmark more than most shop bought gifts. Grandparents who read a great deal will use one every day. To make the gift last, laminate each bookmark with a small laminator or cover it with clear sticky film before punching the hole.
Reading Habits Hidden in a Craft
A child who makes a bookmark often wants to use it. Place a bookmark in a new book and ask the child to find where they stopped each evening. The note lines on the second page support a small reading log: write the page number, or write one word that describes the day’s reading. Libraries and schools often run reading challenges at Christmas, and a handmade bookmark fits that spirit perfectly.
Editing the Bookmarks
All the artwork is made of vector shapes, so you can recolour a design, enlarge it or replace it with another picture from the library. The captions are text boxes, so type a different message such as a name, a year or a short rhyme. On page two, change the border colours to match a school or a team, or type a name into the belongs to line before printing. If you want more than six bookmarks, duplicate the page and change the pictures.
Ways to Give or Use Them
- Class swap: each child makes a bookmark for a classmate and gives it with a card.
- Library giveaway: print a stack and leave them at the desk for readers to take.
- Advent surprise: place a bookmark inside a book as a secret gift.
- Stocking filler: tie a bookmark to a small chocolate bar or a pencil.
Care and Storage of Finished Bookmarks
A paper bookmark lasts longer if it is treated gently. Keep finished bookmarks flat inside a book or an envelope until they are given away, so that the edges do not curl. Avoid damp places, which can warp the card and make the colours run. If a child has made a set to give to friends, a small clear bag for each one keeps the colours fresh and makes the gift look finished. For a bookmark that will be used every day, coat both sides with clear sticky film and trim the edges slightly beyond the card.
Teaching Children to Care for Books
A bookmark is a quiet lesson in looking after books. Instead of folding a page corner, a child learns to use a marker, and that small habit protects library books and family favourites. Make a short ritual out of it: choose a bookmark when you start a new book and return it to the same place each evening. Some families keep a small tin of bookmarks beside the reading chair, and children pick a new one every week. The habit that began with a Christmas craft can last for years.
Bookmark Questions
What paper should I use?
Card stock of about 200 gsm gives the best result, but ordinary paper glued to cardboard also works.
Are the hole marks required?
No. The grey circle is only a guide, and you can skip the hole and add a paper clip instead.
Can I make a bigger bookmark?
Yes. Scale a bookmark up in the editor, keeping the width at about three inches for large books.