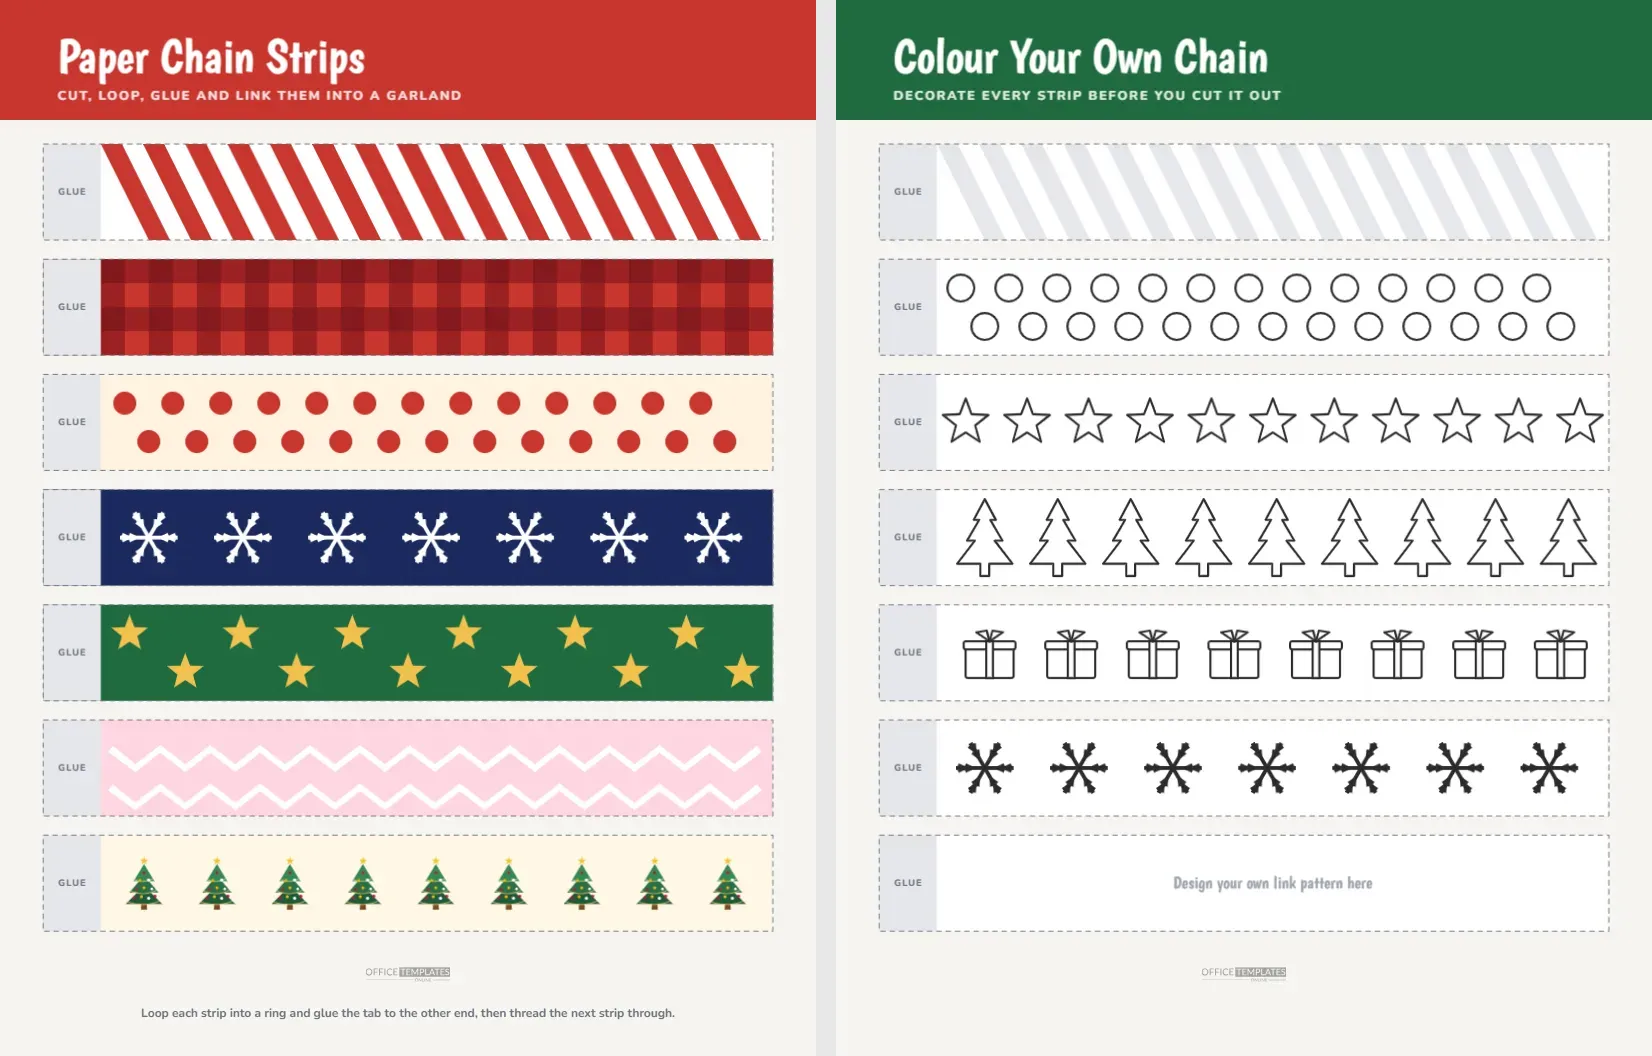
A paper chain is the first decoration many of us ever made. It needs paper, scissors and glue, and it can run from one end of a room to the other. These printable strips take the cutting out of the planning. Fourteen strips on two pages, seven in bold colour and seven to decorate yourself, give you a garland in an afternoon.
Seven Patterns on the Colour Page
| Strip | Pattern | Colours |
|---|---|---|
| 1 | Slanted candy cane stripes | Red and white |
| 2 | Buffalo plaid | Two reds with darker crossing lines |
| 3 | Polka dots in two staggered rows | Red dots on cream |
| 4 | Snowflakes in a row | White on navy |
| 5 | Alternating gold stars | Gold on green |
| 6 | Double zigzag lines | White on pale pink |
| 7 | Small decorated fir trees | Green on cream |
Anatomy of a Strip
Each strip is seven and a half inches long and one inch tall, a classic size for chain links. A grey tab on the left, labelled GLUE, marks where to apply paste. A dashed outline around the whole strip shows where to cut. The pattern fills the rest of the strip, and a header band on the page holds the title Paper Chain Strips with a short line about cutting, looping, gluing and linking. At the bottom of the page, a small instruction reminds you to thread each strip through the last ring before gluing the next.
The Colour Your Own Page
The second page has a green header and the title Colour Your Own Chain. The strips are white with outline shapes: slanted stripes in pale grey, two staggered rows of circles, a row of stars, a line of little fir trees, a line of wrapped gifts and a row of snowflakes. The seventh strip is empty except for a prompt that reads Design your own link pattern here. Children use pens, pencils or markers to add colour, then cut and link as they did with the first page.
Making the Chain, Step by Step
- Print both pages on paper that is light enough to bend easily, about 100 gsm, or on thin card for a sturdier chain.
- Colour any outline strips and let the ink dry.
- Cut each strip along its dashed edge.
- Curl the first strip into a ring with the pattern outside, and glue the grey tab over the opposite end.
- Thread the second strip through the first ring before you close it, and glue it the same way.
- Keep adding links in a pattern until the garland is long enough, then hang it with tape or pins.
How Long Will the Chain Be?
Each link is a ring about two and a half inches across when closed, which gives roughly an inch and a half of chain for each strip once the next one passes through. Fourteen strips make about two feet of garland. To fill a window or a mantel, print several copies and mix colours. A pattern repeat of seven makes a lovely rhythm along a wall. Children enjoy counting links and predicting how long the chain will be before they start.
Skills in a Simple Craft
Cutting strips needs steady scissors, and looping needs spatial thinking: the child has to understand that a strip must pass through a ring before it closes. Counting and pattern repeating appear naturally. Teachers often use paper chains for a class countdown, with one link removed each day. It is also a gentle craft for family evenings, since children and adults can work at the same table, each making their own part of the chain.
Countdown Chain Idea
Write a number on the back of each link, from one to twenty four, or a small activity such as sing a carol. Link them in order so that the number one link hangs lowest. Each morning in December, tear off one ring and do the activity written on it. The chain shrinks day by day until Christmas arrives. Because the patterns are different on each strip, the garland looks cheerful while it counts down.
Editing the Strips
All patterns on page one are made from vector shapes, so you can recolour them to match a room, such as turning red and green into blue and silver. The snowflakes, stars and trees are separate objects that can be moved or deleted. To change the length of a strip, resize the whole group, remembering to keep the tab at the left. For an extra long chain, duplicate a strip in the editor and move it down the page. If you want to write on the strips, use the text tool to add a name or a message such as Merry Christmas.
Printing the Garland
Choose a paper that is thin enough to curl and sturdy enough to survive gluing. A glue stick is neater than liquid glue for children, and double sided tape is fastest. Print at full size so that each strip is one inch tall. If your printer cannot reach the edges, trim the white margin at the end of each strip, since the tab on the left has plenty of room for gluing. Use a ruler and a craft knife for adults who want a neat edge, or a paper trimmer if one is available.
Ways to Use the Finished Garland
- Doorway: hang a chain across the top of a door frame.
- Christmas tree: loop a chain around the branches like a string of beads.
- Classroom ceiling: tape long chains from corner to corner.
- Gift wrap: use a short chain as a decorative bow on a present.
Mixing Patterns for a Balanced Garland
A garland looks best when patterns and colours alternate in a rhythm. Link a striped ring, then a plain or dotted ring, then a bold plaid, so that the eye has places to rest. Placing the red and white candy stripe next to the navy snowflake strip gives a strong contrast, while the green stars and cream trees suit a quieter corner. Step back every few links and look at the chain from across the room. If one colour dominates, add a ring from the opposite end of the palette. Children enjoy this small design decision and often arrange their own colour patterns.
Paper Chain Questions
What age is the craft for?
Children from about four can link the strips with help, and children from six can cut and glue by themselves.
What if I run out of strips?
Print another copy, or cut plain coloured paper into one inch strips and add them in between.
Can I use sticky tape instead of glue?
Yes. Double sided tape works well, and ordinary tape holds a link firmly if you press it down.