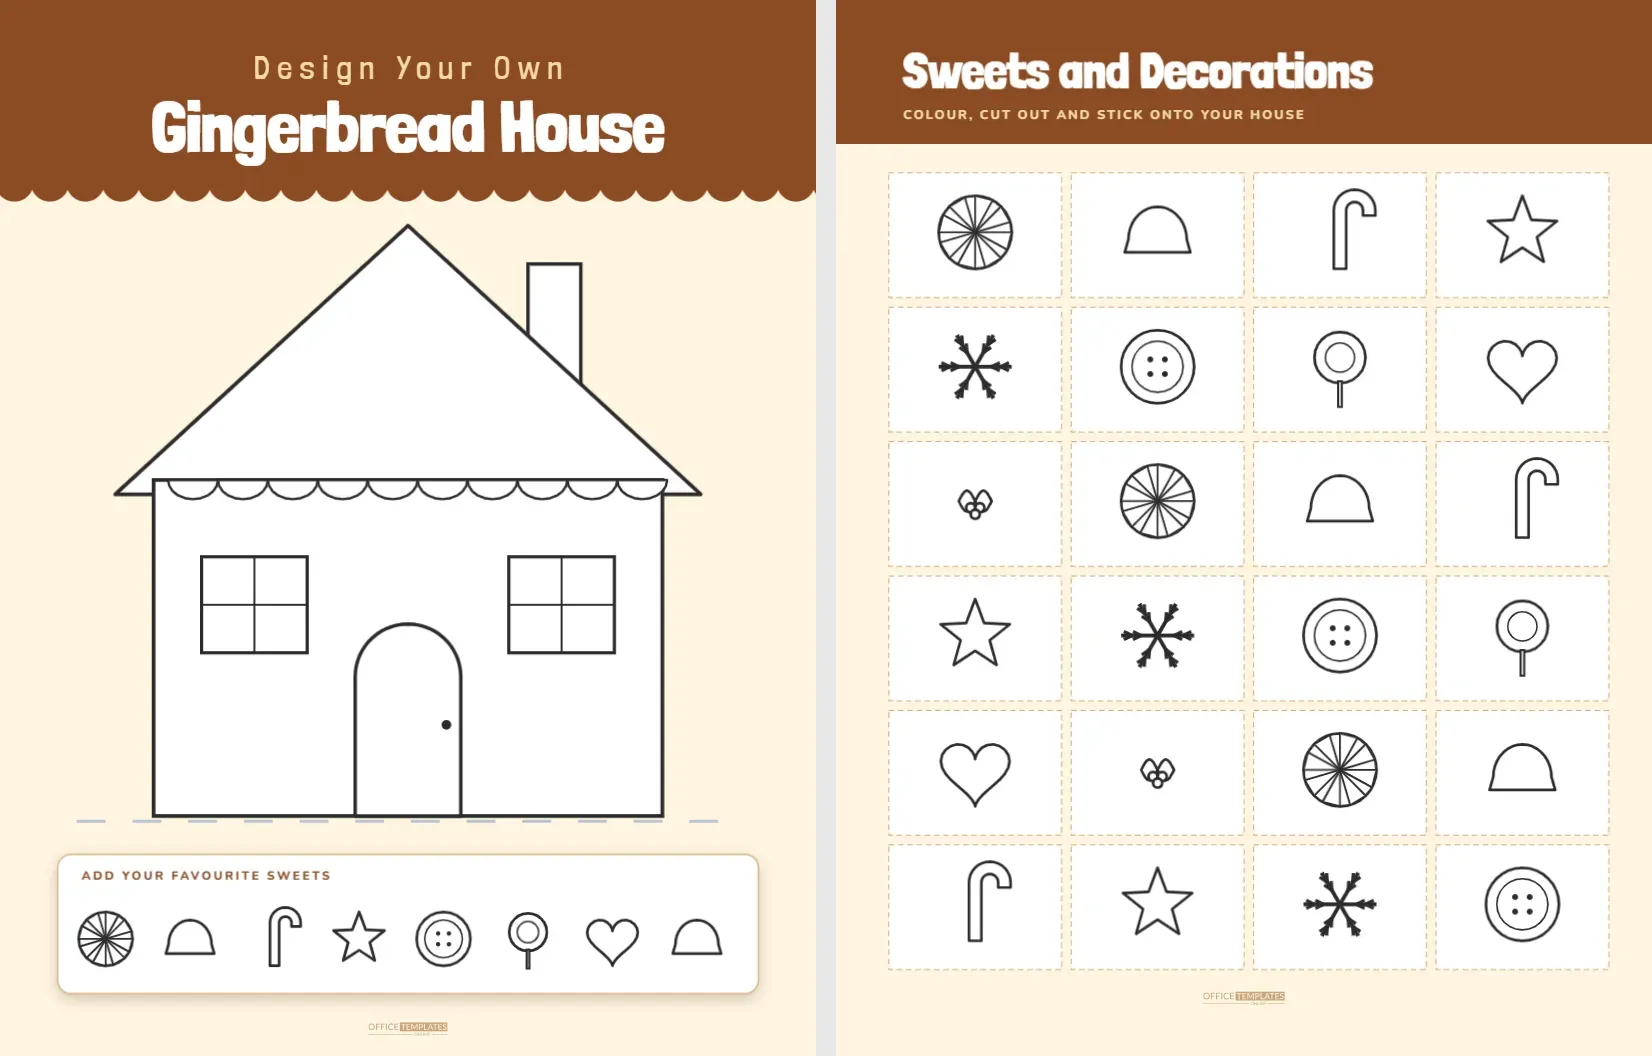
Building a real gingerbread house is wonderful and messy, and the result is eaten before New Year. A paper gingerbread house lasts, costs nothing and lets a child design without the risk of a collapsing roof. This activity gives children a big blank house to decorate, a row of sweets to colour and a second page of twenty four stickers to cut out and glue on.
The Blank House
The first page has a chocolate brown band along the top with a scalloped lower edge, like icing running down a cake. The words Design Your Own appear in spaced pale capitals, and Gingerbread House fills the width in a heavy white face. The house below is drawn in dark lines on a cream page: a steep triangular roof, a tall chimney, a rectangular wall with a scalloped edge under the roof, a rounded door with a tiny knob and two windows with crossbars. A short dashed ground line sits at the base.
What to Draw With the Pieces
| Part of the house | Idea for decoration |
|---|---|
| Roof | Rows of candy tiles, stripes or a snow covering |
| Chimney | A candy cane pattern or white icing on top |
| Wall | Gumdrop buttons, wafer bricks or icing zigzags |
| Door | A big peppermint wreath or a row of tiny lights |
| Windows | Coloured glass in sugar panes, with icing frames |
| Garden | Pretzel fences, sugar trees and a snowman |
The Sweets Tray
At the foot of page one, a white tray holds eight outlined sweets to colour: a peppermint wheel, a gumdrop, a candy cane, a star, a round candy button, a lollipop, a heart and a second gumdrop. The tray is an invitation to start with a sweet and then add the colour to the house. Children can colour the sweets as examples and draw their own copies on the house, or leave them alone and use the second page for stickers.
Page Two, Twenty Four Stickers to Cut Out
The second page repeats the brown band with the title Sweets and Decorations. A grid of dashed rectangles, four across and six down, holds twenty four outlined shapes from nine different types: peppermints, gumdrops, candy canes, stars, snowflakes, buttons, lollipops, hearts and holly. Each cell is a cut guide. Children colour the sweets, cut along the dashes and glue them to the house in any pattern they like.
A Step by Step Plan for the Afternoon
- Print both pages and set out colouring pencils, scissors and a glue stick.
- Start by colouring the house walls and roof with a base colour, such as warm brown.
- Colour the sweets on page two with bright colours.
- Cut out the sweets one by one.
- Arrange the stickers on the house before gluing them down, and ask the child to explain the design.
- Give the house a name and write it at the top, such as Candy Cottage or Peppermint Lodge.
Skills in the Pieces
This is a design task as much as a craft. Children plan a layout, choose colours, work with patterns and think about what looks balanced. Cutting small shapes strengthens fine motor skills, and gluing in place trains accuracy. Talking about the finished house builds vocabulary, as the child describes textures, shapes and colours. Some children plan every detail in advance, while others improvise. Both ways are valid, and each makes a different kind of house.
Making the House Your Own in the Editor
Everything on the page is editable. Select the roof to recolour it or change its outline, or delete the windows and add more. The sweets are simple vector shapes, so you can resize any of them or ungroup the peppermint to colour each wedge separately. To create a bigger sticker, scale a candy up and move it onto the house in the editor, then print for a house that is already half decorated. You can also add a name line at the top for a classroom display.
Ideas for a Gingerbread Party
- House contest: give each guest a page and a prize for the most creative design.
- Village display: tape the finished houses side by side to make a gingerbread street.
- Real house plan: use the paper design as a blueprint for a real gingerbread house.
- Card craft: cut the finished house out and glue it to a folded card.
Paper and Glue Advice
For colouring and gluing, use a slightly heavier paper, around 120 gsm, so that glue does not wrinkle the page. Print the second page on a sticker sheet if you would like peel and stick shapes, or use a glue stick for plain paper. The brown band is a large area of colour, so use draft quality to save ink if you are printing for a group.
Planning a House Before You Colour It
A good house starts with a plan, even a small one. Ask the child to choose a theme: a candy cottage, a winter lodge or a cosy village shop. Then pick three main colours and stick to them. A limited palette makes a house look designed rather than messy. Decide where the biggest candies go, usually near the door or on the roof, and where the small ones fill gaps. Let the child sketch the plan lightly in pencil first. Children who plan before colouring tend to finish with a result they are proud of.
Turning a Paper House Into a Real One
Many children are inspired to build the real thing after designing the paper version. Use the finished picture as a guide: the roof pieces go where the triangle is, the door sits in the middle and the candies follow the plan. Look up a simple gingerbread house kit or bake flat panels together, and decorate with icing and sweets according to the design. The paper plan helps younger children make decisions in advance, which prevents the arguments that sometimes arise when everyone reaches for the same sweet at once.
Gingerbread House Questions
Can the sweets be coloured with markers?
Yes, though markers can bleed through thin paper. Use pencils or crayons if the paper is lightweight.
Are the sweets different on every cell?
There are nine designs repeated across twenty four cells, so a child can choose which ones to colour and cut.
Can I use the house for a different holiday?
Yes. Decorate it with spooky sweets for autumn, or flowers for spring, and change the title in the editor.