The first ten minutes of any event decide how it feels. A long queue at a registration desk, a volunteer flipping through printed lists, and a guest who cannot find their name all set the wrong tone. A check-in QR code lets attendees register themselves on their phones while staff helps only the people who need it. This US Letter sign makes the self-service option obvious from the moment people walk in.
Built for a Crowded Entrance
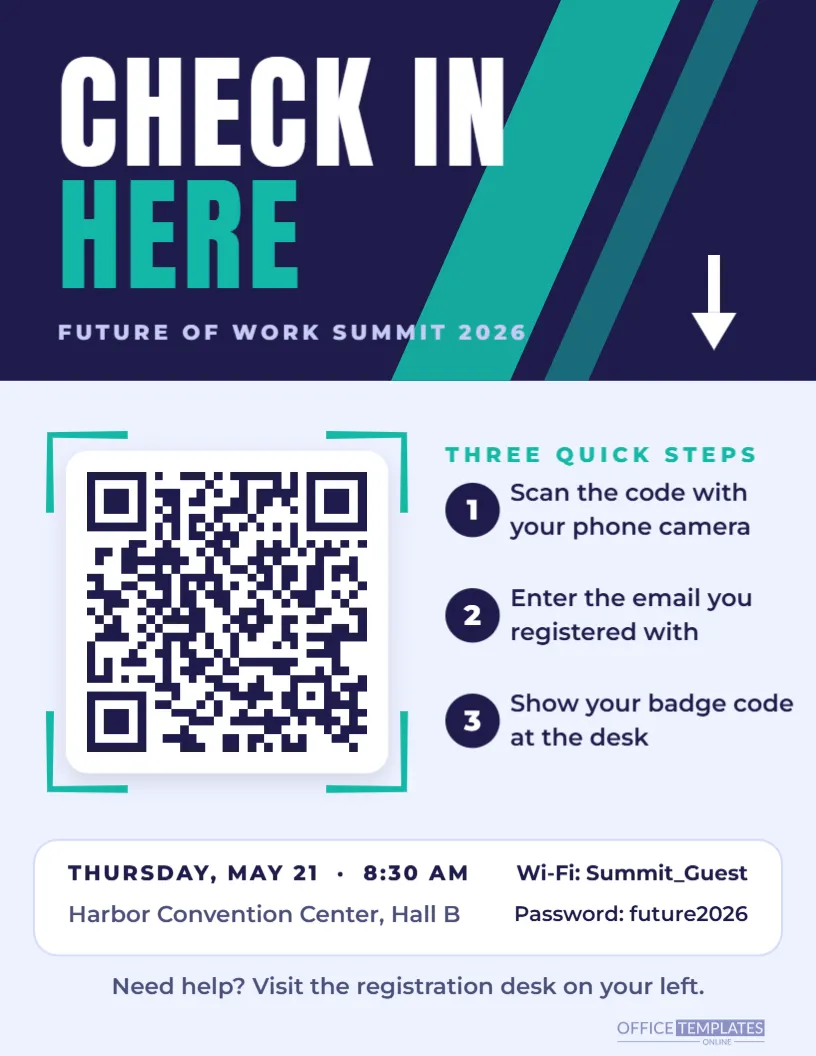
The top third is a deep indigo block crossed by two teal diagonal stripes. CHECK IN is set in huge white Anton capitals with HERE in teal underneath, sized to read from across a lobby. The event name, Future of Work Summit 2026, sits below in small-spaced capitals, and a white arrow on the right points down toward the code.
On the pale lavender lower section, the QR code sits on a white plate with a soft shadow and teal corner brackets. To its right, THREE QUICK STEPS introduces three numbered indigo circles: scan the code with your phone camera, enter the email you registered with, and show your badge code at the desk. A white information strip below lists the date, time, and venue on the left and the event Wi-Fi network and password on the right. A final line points anyone who needs help to the registration desk.
Connecting the Code to Your Registration System
Most event and ticketing tools give organisers a check-in page or a self-check-in link. Some tools instead use a form that looks up attendees by email. Whichever you use, the sign only needs the address of that page.
- Find the self check-in or attendee lookup link in your event platform.
- Select the QR code on the sign and click Edit Code.
- Paste the link into URL/Website and press Update QR Code.
- Rewrite the three steps if your process is different, for example, pick up your printed badge.
- Check in as a test attendee before the doors open, using your own phone and mobile data.
Planning the Entrance Flow
A sign alone does not create a fast check-in; the layout of the space does. Experienced organisers think about where people stop, where they queue and where they need help.
| Zone | What happens there | Signs needed |
|---|---|---|
| Entrance door | First impression; people slow down | One check-in sign on an easel, facing arrivals |
| Self check-in area | Attendees scan and confirm on their phones | Two or three signs spaced apart to spread the crowd |
| Help desk | Staff fix lost emails and walk-ins | A separate Need help? sign |
| Badge pickup | Printed badges or lanyards handed out | A sign with alphabetical sections if badges are pre-printed |
| Session rooms | Late arrivals check in at the door | One smaller copy taped beside each room |
Watch the first wave of arrivals closely. If people bunch up around one sign, move a second one a few metres away; if many are heading straight to the desk, put a volunteer beside the sign to say you can check in on your phone right here.
Event Day Checklist
- Print one more sign than you think you need; easels get moved, and signs get bent.
- Bring tape, clips, and a spare easel.
- Test the check-in page on the venue Wi-Fi as well as mobile data.
- Give volunteers a tablet or laptop with the attendee list as a backup.
- Check that the Wi-Fi details printed on the sign match the venue’s network that day.
- Assign one person to walk the entrance every hour and straighten signs.
Changing Colours, Name and Details
The indigo and teal palette feels modern and suits technology, business and education events. To match your event branding, select the top block and stripes and change their fill: red and charcoal for a sports event, green and cream for a sustainability forum, black and gold for an awards evening. Replace the event name, date, venue, and Wi-Fi details by double-clicking each line. The headline font is Anton, a strong condensed face; supporting lines use Montserrat, and you will find each of them in the editor’s font list.
If your event has a logo, add it to the top block next to the headline or replace the arrow with it. Keep the QR code on its white plate so it stays easy to scan under bright venue lighting.
From Office Printer to Foam Board
The sign is US Letter size, 8.5 x 11 inches, so you can print it on any office printer the morning of the event. For a more polished look, ask a print shop to mount it on foam board, which stands up well on an easel. If you want a larger sign for a big lobby, scale the design up to 18 x 24 inches; it is built from shapes and text, so it stays sharp at any size. The QR code prints at about three inches wide on the letter version, readable from a couple of metres away.
Download a PNG as well and add it to your pre-event email, so attendees know to look for the sign when they arrive.
Parent Evenings, Gym Classes and Clean-Up Days
The same layout works for many gatherings. Schools use it for parent evenings and open days, gyms for class check-ins, churches for kids’ ministry sign-in, clinics for vaccine drives, and volunteer groups for clean-up days where attendance must be recorded. Change CHECK IN HERE to SIGN IN HERE or REGISTER HERE and the three steps to match.
Questions From the Registration Desk
What about guests who did not register online?
Direct them to the help desk. Many platforms let staff add walk-ins on a phone or tablet in a few seconds.
Can the code open a form instead of a ticketing system?
Yes. Any online form that collects names and emails works for simple meetups and workshops.
Is it safe to print the Wi-Fi password?
For a public event network, yes. Never print a password for the venue’s private or staff network.
Add your check-in link, event name, and venue details, and print enough copies for every entrance. Your attendees will be inside and seated while other events are still queuing.