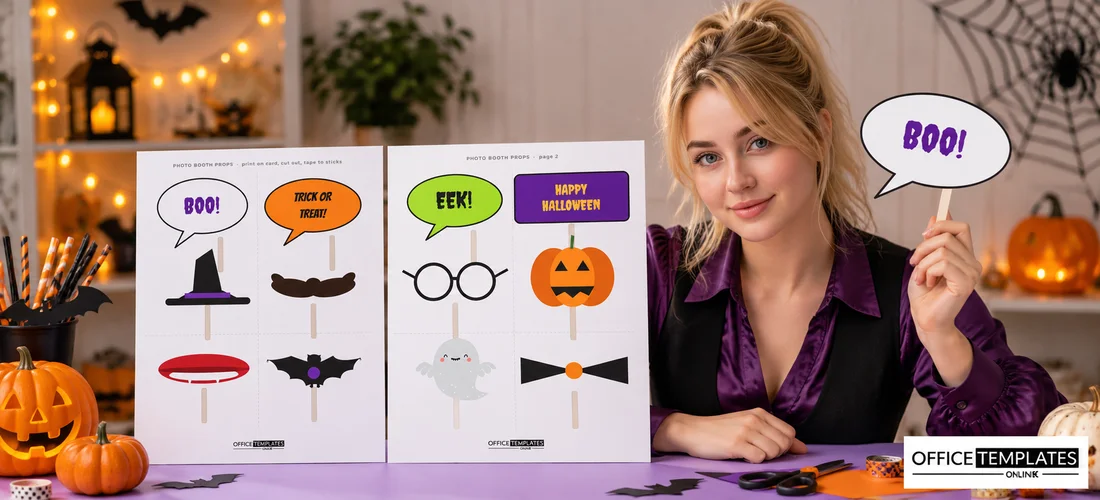
A photo booth corner is one of the easiest ways to make a Halloween party memorable. Add a backdrop, a few lights, and a basket of props on sticks, and guests will happily pose for photos all night. Props get even shy guests into the frame. This printable set gives you twelve bold Halloween props across two pages, ready to print, cut out, and tape to sticks.
Twelve Props on Two Pages
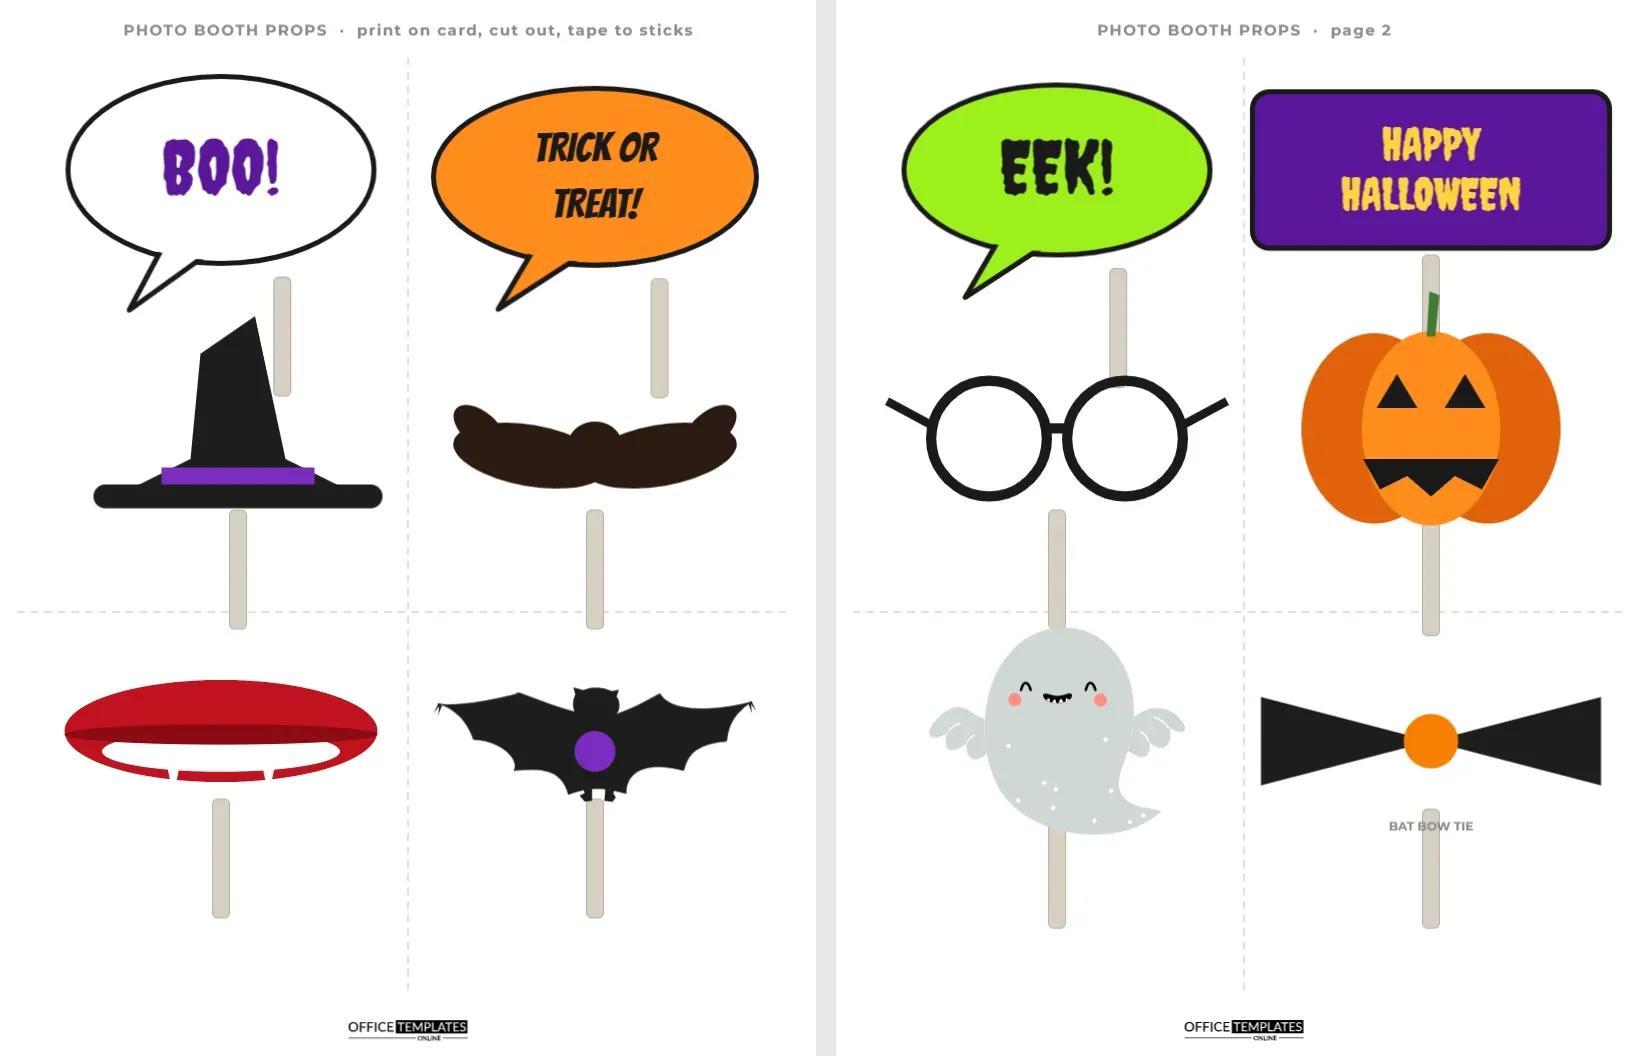
Both pages are US Letter size, 8.5 x 11 inches, with four props each. A small line at the top reminds you to print on card, cut out, and tape to sticks. Each prop has a pale grey stick tab showing where to tape a dowel or wooden skewer. Dashed lines divide each page into quarters to make cutting easy.
Page one:
- A white speech bubble outlined in black with BOO! in purple Creepster.
- An orange speech bubble with TRICK OR TREAT! in black Bangers lettering.
- A black witch’s hat with a purple band.
- A curly dark brown moustache.
- Red vampire lips with white fangs.
- A black bat with a purple circle in the middle.
Page two:
- A lime green speech bubble with EEK! in black Creepster.
- A purple sign with HAPPY HALLOWEEN in yellow Creepster.
- A pair of round black spectacles.
- A grinning orange jack-o’-lantern.
- A cute friendly ghost.
- A black bat bow tie with an orange centre.
How to Make the Props
- Print both pages in colour on thick card stock, around 250 to 300 gsm.
- Cut out each prop, leaving a small white border if you find exact cutting tricky.
- Glue a second piece of card to the back for extra strength (optional).
- Tape or hot-glue a wooden dowel, skewer, or paper straw to the back of each prop, over the grey stick tab.
- Stand the finished props in a basket, a cauldron, or a jar next to the photo booth.
Setting Up a Photo Booth Corner
| Element | Easy option | Upgrade |
|---|---|---|
| Backdrop | A black tablecloth with paper bats taped on | A sequin or fringe curtain in orange and purple |
| Lighting | A string of warm fairy lights | A ring light on a tripod |
| Camera | A phone on a stand with a timer | An instant camera for printed photos |
| Props | This printable set on sticks | Add hats, boas and masks |
| Signage | A sign reading Strike a spooky pose | A hashtag sign for sharing photos online |
Personalising the Speech Bubbles
The text in every speech bubble and the sign is editable. Change BOO! to the birthday person’s name, add your party hashtag to the HAPPY HALLOWEEN sign, or write funny phrases such as I’m only here for the candy, Witch, please, or Fangs for coming. Duplicate a speech bubble to make more phrases, and recolour the bubble fill to match your party colours.
Prop Ideas for Different Parties
- Kids’ parties: stick to the friendly props: the ghost, pumpkin, bat bow tie, and BOO! bubble.
- Office parties: add speech bubbles with work jokes, such as This meeting is killing me.
- Couples’ parties: pair the vampire lips with the moustache for classic photos.
- Weddings in October: add a Till death do us part bubble for a playful Halloween wedding.
- School events: add the school mascot or name to the sign.
Recolouring and Swapping Props
Every prop is made of shapes, text, or editable vector artwork, so it is easy to change. Select the witch hat to recolour the band, the moustache to make it ginger or grey, or the speech bubbles to swap their fill colours. The bat and ghost are vector illustrations you can recolour from their swatches. Resize any prop by dragging its corner, and keep the grey stick tab underneath as a guide. Fonts are Creepster and Bangers, both available from Google Fonts.
Prop Safety for Little Hands
For children’s parties, use paper straws or thick craft sticks instead of pointed skewers, and sand or tape any sharp dowel ends. Keep hot glue guns away from children while assembling, and let the glue cool completely before handing out props. Large, sturdy props are easier for small hands to hold steady for a photo.
Storing the Props for Next Year
A good prop set can last for many Halloweens. After the party, wipe laminated props clean, check that sticks are still firmly attached, and store them flat in a large envelope or a shallow box with a sheet of tissue paper between them. Label the box clearly so it is easy to find next October. Each year you can print a few new speech bubbles with fresh jokes, so the set grows without having to start from scratch.
Sharing the Photos
After the party, gather the best booth photos into an album and share it with guests. A photo from the booth also makes a great image for a thank-you card. If you used a hashtag sign, guests can find each other’s photos online. Some hosts print a few instant photos during the party for guests to take home as souvenirs.
Printing the Props
Download the PDF and print both pages on heavy card stock in colour. The bold shapes and black outlines print clearly on any printer. For extra durability, laminate the sheets before cutting, which also stops the props wilting in damp autumn air. Print two sets for big parties, so there are enough props to go around.
Photo Booth Prop Questions
How big are the props?
Each prop fills about a quarter of a letter-size page, large enough to show clearly in photos.
Can I print only one page?
Yes. Choose the page you want when printing, or delete the other in the editor.
Can I add my own phrases?
Yes. Edit the speech bubble text or duplicate a bubble to create new ones.
What sticks work best?
Wooden dowels, thick skewers, lollipop sticks, or sturdy paper straws all work well.
Print, cut, and stick, then set up the booth. The best photos of the night are waiting for someone brave enough to hold up the vampire lips.