Film is back. Community darkrooms are opening, labs are busy developing rolls again, and universities are refilling their chemistry cupboards. With that revival comes a need for the people who run the darkrooms, and for rules that keep everyone safe around developer, fixer, and total darkness. This Darkroom Technician ID Card is made for photo lab staff, darkroom managers, film processing technicians and instructors. It is moody, warm and unmistakably analogue: the glow of a safelight, prints drying on a line and the three trays every darkroom student learns first.
Safelight Red and Prints on the Line
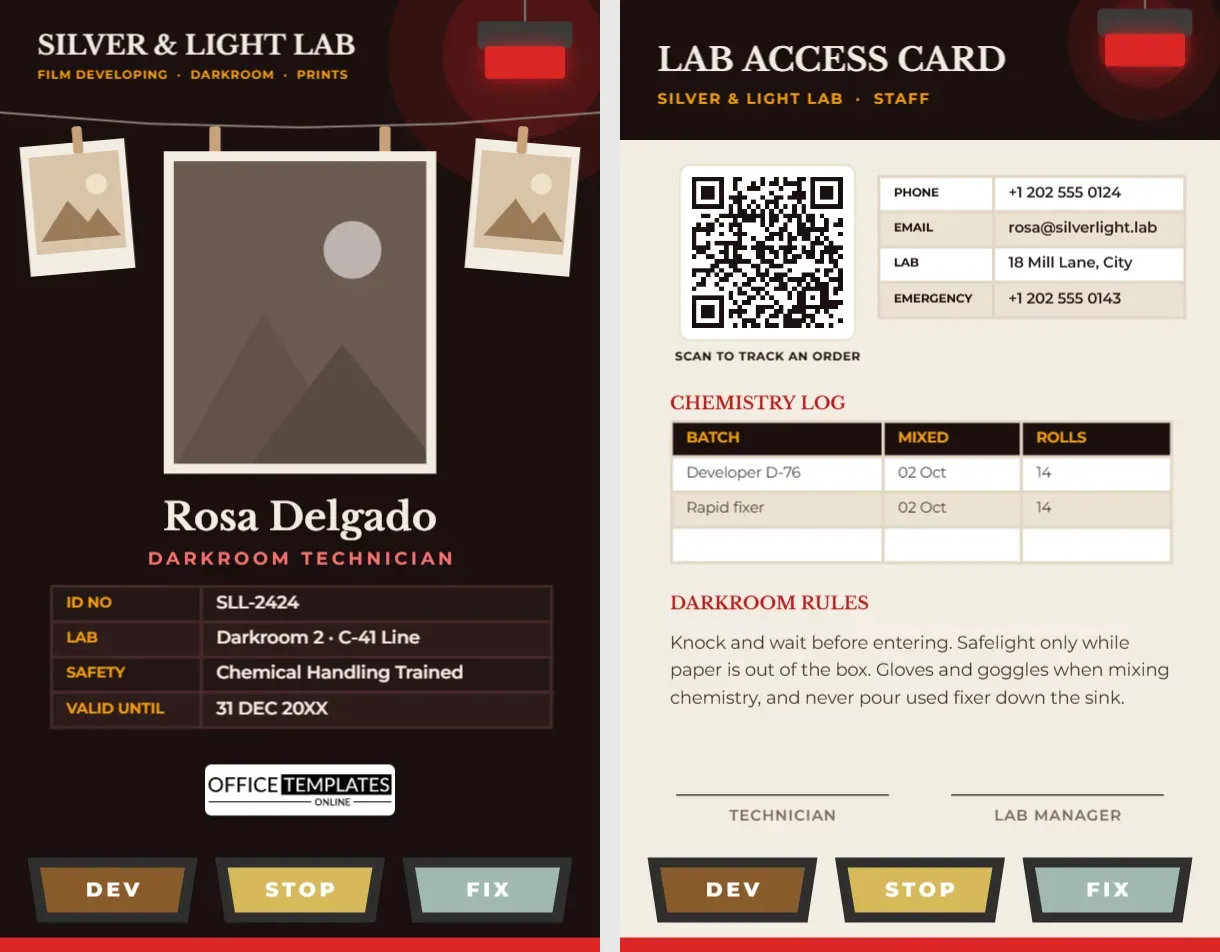
The front of the card is a very dark red-brown, the colour of a darkroom with the lights off. In the top right corner hangs a safelight, a grey housing with a glowing red lens, surrounded by a soft red glow. SILVER & LIGHT LAB is set on the left in Libre Baskerville, a classic book serif, with Film Developing · Darkroom · Prints in amber.
A thin line stretches across the card below the header, and prints hang from it with wooden pegs. Two small sepia prints, one on each side, are slightly tilted as if they had just been clipped up. In the middle, your photo is the main print, with a thick cream paper border and two pegs holding it to the line. Your name, Rosa Delgado, on the sample, is set in cream, with DARKROOM TECHNICIAN in soft red capitals. A dark table lists your ID number, lab and process line (Darkroom 2 · C-41 Line), chemical safety training, and expiry date. Our logo sits on a white plate, and the footer shows three developing trays labelled DEV, STOP and FIX, filled with brown, yellow and grey-green liquid, above a red line.
The card measures 2.125 by 3.375 inches in portrait, the CR80 badge standard.
The Lab Access Card
The back switches to a warm paper tone. A dark header with the safelight reads LAB ACCESS CARD. Below it:
- A QR code labelled Scan to track an order, useful for labs that let customers follow their film through processing.
- A contact table with phone, email, lab address, and emergency number.
- A chemistry log table recording batch, date mixed, and number of rolls processed: developer D-76 and rapid fixer mixed on 02 Oct, 14 rolls each, plus a blank row.
- Darkroom rules: knock and wait before entering; safelight only while paper is out of the box; gloves and goggles when mixing chemistry; never pour used fixer down the sink.
- Signature lines for the technician and lab manager, above the same three trays.
The Black-and-White Printing Sequence
The three trays on the card are the heart of the traditional print process. Here is what happens in each step:
| Step | What it does | Typical time for resin-coated paper |
|---|---|---|
| Developer | Turns exposed silver halides into black metallic silver; the image appears | About 1 minute |
| Stop bath | A mild acid halts development instantly | About 10- 30 seconds |
| Fixer | Removes unexposed silver so the print is no longer light-sensitive | About 1-2 minutes |
| Wash | Removes fixer so the print lasts | Several minutes in running water |
| Dry | On a line or rack, like the prints on this card | Until fully dry |
Times vary with paper and chemistry; always follow the manufacturer’s instructions. Fibre-based papers need longer fixing and washing.
Keeping the Darkroom Safe
Photographic chemistry is safe to use with sensible precautions, but it must be treated with respect. Mix concentrates in a ventilated area, wearing gloves and eye protection. Label every bottle with its contents and the date it was mixed, which is exactly what the chemistry log on the back of the card is for. Keep food and drink out of the darkroom. Used fixer contains dissolved silver and should be collected for proper disposal or silver recovery rather than poured down the drain; your local authority can advise. And because people move around in near darkness, keep floors dry and clear, and always knock before opening the door.
Customising the Lab Badge
- Photo: click the main hanging print and choose Replace Image. A black-and-white portrait looks especially good here.
- Lab name: retype SILVER & LIGHT LAB and the amber line of services, for example, Film Processing · Scanning · Workshops.
- Tables: every grid on the card, from the ID rows to the chemistry log, changes through Edit Data. Add more chemistry batches with + Row.
- QR code: point it to your order tracking or booking page in the Barcodes & QR panel.
- Trays: the trays are one group; relabel them in another language or recolour the liquids.
- Safelight and prints: the safelight and each small print are separate groups, so you can move or delete them.
For Labs, Schools and Community Darkrooms
Commercial film labs, one-hour photo shops, community darkrooms with members, university and art school darkrooms, alternative-process studios (cyanotype, platinum and wet plate), and film camera shops with processing counters can all use it. Community darkrooms can print membership cards with the member’s name, the lab hours in the table, and a QR code to the booking system.
Printing a Dark, Warm Design
The near-black red-brown background needs a good printer to avoid banding, so print on PVC or at a print shop for staff cards. The soft red glow around the safelight is semi-transparent; check that it looks like a glow and not a flat blob on your printer. Laminate cardstock versions, because darkroom badges meet wet hands. Clip the card to your apron, well away from the trays.
Darkroom Questions
Can I use it for colour processing?
Yes. Change the tray labels to your process steps, such as DEV, BLIX and WASH for colour paper, and update the lab line.
Why red light?
Black-and-white paper is not sensitive to red, so a red or amber safelight lets you see while printing. Film must be handled in total darkness.
Are the hanging prints photo slots?
Only the large central print is a photo slot. The two small prints are decorative shapes.
Open the template, hang your portrait on the line, set your lab details, and keep the safelight glowing.